Building a Neck

Table of contents
- Modification date
- Introduction
- Tools
- Raw materials
- Preparing the neck blank
- Routing for
the truss rod channel
- Cutting the rough neck shape
- Thicknessing the peghead
- Final shaping the neck outline
- Relieving the back of the neck
- Preparing the fretboard
- Slotting
the fretboard
- Drilling
the truss rod access hole
- Gluing the fretboard to the neck
- Rough cutting the fretboard to the neck shape
- Installing fret inlays or markers
- Shaping the peghead to fretboard curve
- Shaping the back of the neck
- Peghead and neck heel logos
- Radiusing the fretboard
- Finishing the fretboard
- Insert side dot markers
- Install the frets
- File the fret ends
- Leveling the frets
- Crowning the frets
- Dressing the frets
- Finishing the neck
- Drilling the tuner holes
Modification date: September 8th, 2026
Introduction
When I first started making guitars I was a neck-through snob. I figured that Carvin had it right, the most logical way to make a guitar was to make it neck-through with add on wings. This just made sense to me in that the strings were attached at both ends to the same piece of wood. If you look at the history of commercial electric guitars you'll find that there were two schools of thought. First, the traditional method of building a body with the neck "set" into it. This was Gibson's approach and you can understand where that came from. They had a long history of making acoustic guitars and that's just how you did it. The second method was the bolt-on (actually, the screw-on but that just sounds wrong). This was Fender's approach and you can also understand where that came from when you realize that Leo Fender was essentially an engineer and not a guitarist. He wanted the most efficient way to build a guitar on an assembly line using the least amount of lumber. There are a couple of advantages to this method. First, since the neck doesn't have an angled headstock it is less likely to break off. Second, if the neck does actually break, you can always put a new one on it with very little effort. Once I built that cheap StewMac Strat kit I found that I actually like the bolt-on method. It came in very handy later as I played around with 25" scale, 24.75" scale, and finally 24.07" scale. I didn't have to make new guitars to do that, I just made new necks. Honestly, if you're going to go through the trouble of making a set neck guitar why not just get rid of all of the hassle and make it neck-through. Lining up the neck pocket for a set neck is a nightmare. If you make it neck-through there is no lining up to be done. Just glue on the wings and go to town.Making guitar necks is the hardest part of building a guitar. It requires quite a few more tools than just building a guitar body. Also, it's the first thing you should do when building a guitar. Everything else depends on the neck. I used to buy Warmoth conversion necks. That is, a 24.75" scale neck that would fit into a standard Strat or Tele style body. When I started making my own necks I realized that I could make any kind of conversion neck that I wanted. I made 25" scale conversion necks, 24.75" conversion necks, and, after my arthritis got bad, 24.07" conversion necks. Wait, what? 24.07"? What's up with that? Well, I don't know how this actually happened but I can imagine the scene... Leo is hanging out at Fender when one of his people says, "Leo, we have to make a short scale neck! It's all the rage! We'll have to build a bunch of new fretting jigs!". And Leo, being Leo, says, "Hand me that 25.5" slotted fretboard you have over there.". When he gets it he looks at it and says, "Just cut the fretboard off about a half inch north of the first fret and then put the nut where the first fret was.". Et voila, a 24.07" scale neck. Without retooling. If you check the scale on a Jaguar or buy a "24 inch" fret slotting template and measure it, you'll find that it's actually 24.07 inches. This leads to a short cut for making a short scale fretboard - just buy a 25.5" slotted, radiused fretboard, chop it off about a half inch north of the first fret, then make the nut slot where the first fret was (the fret slot becomes the leading edge of the nut).
Tools
Before you get started you need to look at the tools that you need to have to build a bolt-on neck. Read the Tools page to see what you need. If you price that list out you’ll see that it gets pretty darn expensive (making guitar bodies requires far fewer tools). If you’re only going to make one neck then, instead, I would recommend buying one from Warmoth (get the stainless steel frets so that they won’t ever wear out). Now, since an unfinished Warmoth neck made of maple with a maple or rosewood fingerboard (with SS frets) costs about $250 you can see that buying the tools pays for itself somewhere between neck number 2 and neck number 3. Also, I’ve bought 4 Warmoth necks and they have all been very well made but, no matter how good a job they do on setting them up, you’ll still have to level (and, optionally, add fall away), crown, and dress the frets if you want really good action. One of the Warmoth necks I bought looked like a banana when I got it so I sent it back. They said all I had to do was to really crank down the truss rod and it would straighten out. I had tried straightening it out by tightening the truss rod but it was so hard to turn that I decided to send it back. Necks that cost $250 shouldn’t show up looking like that. I’ve also bought a few GFS (Guitar Fetish) necks (way cheaper) and the same holds true for them. Actually the best neck I ever got (requiring the least amount of work to get right) came from GFS... but so did the worst one. There are others, like Mighty Mite.If you're going to buy a pre-slotted fretboard blank then you won't need the fret slotting jig but you'll still need a fret slotting saw to re-saw the frets after radiusing the fretboard. Keep in mind that the first guitar I ever made was built with only a few of those tools (specifically, a router, a random orbit sander, a fret saw, and a cheap three corner file. Albert Lee liked it so I must have done alright.
Raw materials
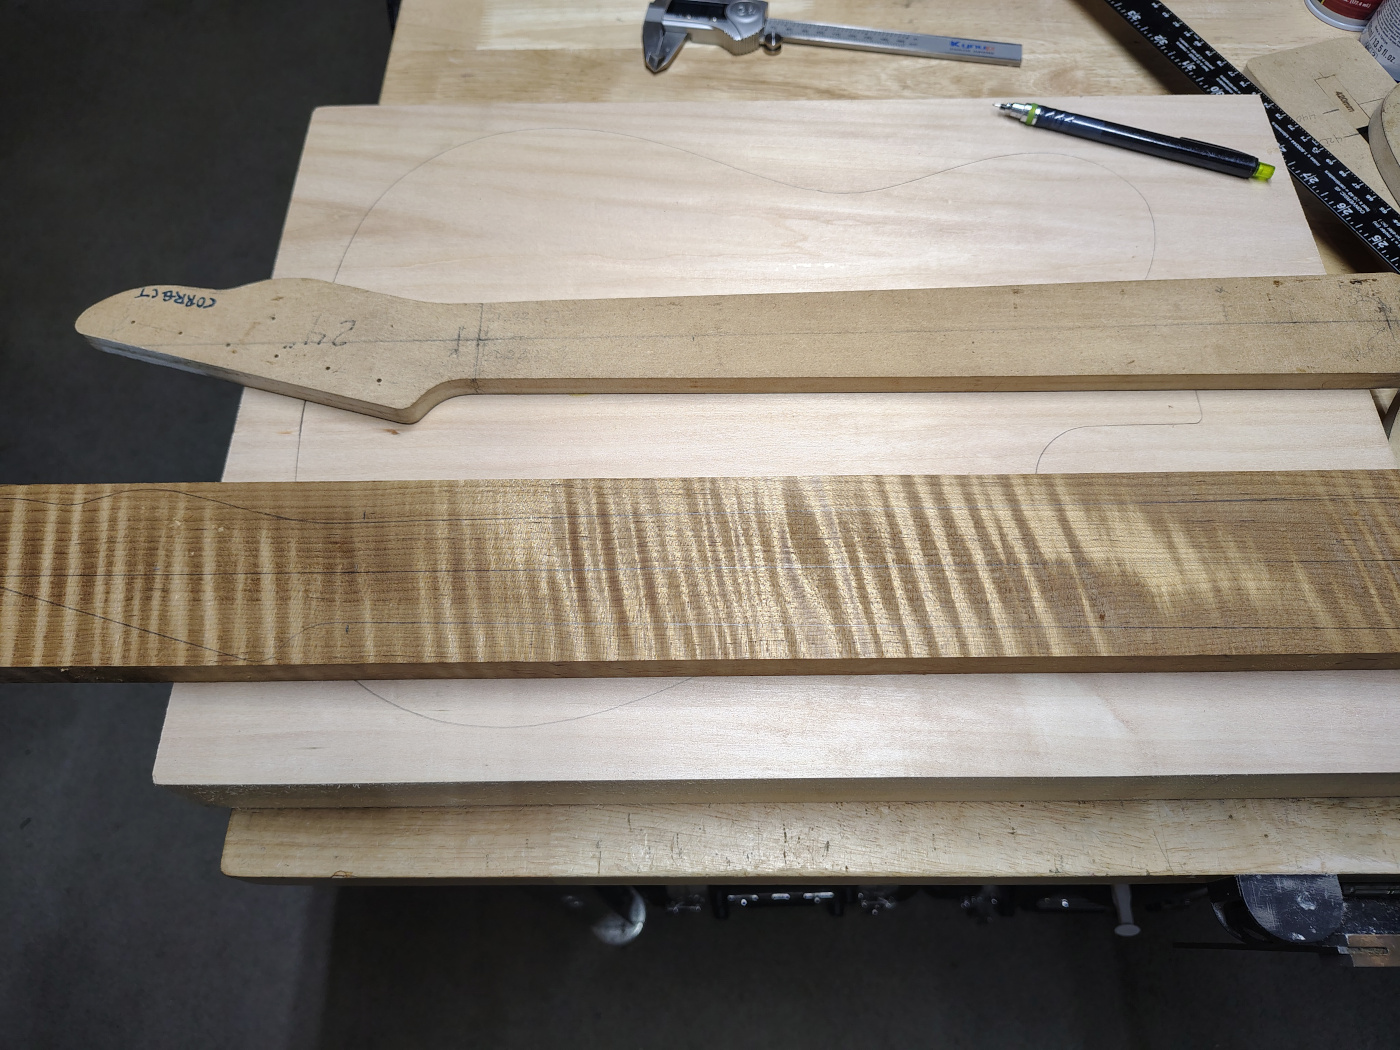
For this build, and almost every other one unless I want to stain the neck, I use a quartersawn, roasted flame maple neck blank from American Specialty Hardwood. When I start to lay out the neck on it I try to get the most figure on the top at the peghead and the upper side (which will be facing the player).
×
![]()
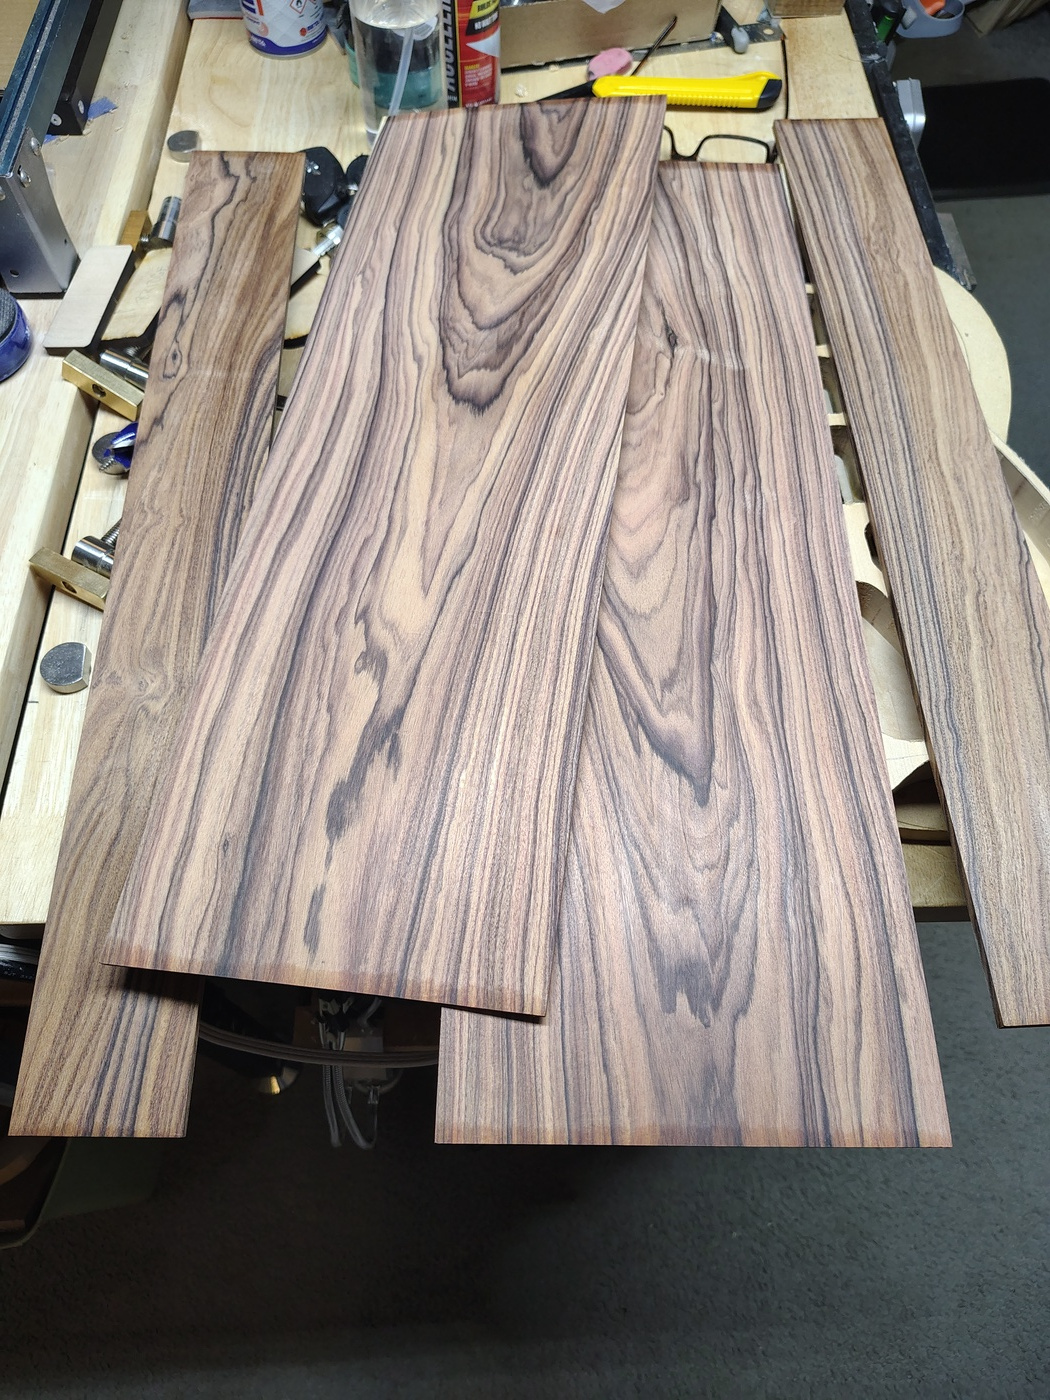
You also need a fingerboard blank. These are usually about 18" x 3" x1/4". You can get blanks for about $20, slotted blanks for about $30, and, on StewMac, slotted, compound radiused (10" to 16") for around $45. This is all assuming East Indian rosewood. The price goes up for more exotic wood and down for plain maple. For this build I did something different. Since I was already going to order two 24" x 8" x 1/8" piece (veneer if you will) of Bolivian rosewood (not real rosewood) from Ocooch Hardwoods I thought that I might go ahead and order two pieces of 24" x 3" x 1/4" Bolivian rosewood. They cost $6 apiece.
×
![]()
When I got the wood I was blown away by how beautiful it was. I used the small piece on the left. One thing about Bolivian rosewood though, it can have worm holes. There was a 1/8" worm hole in the one on the left so I had to get a bit creative to get around it.
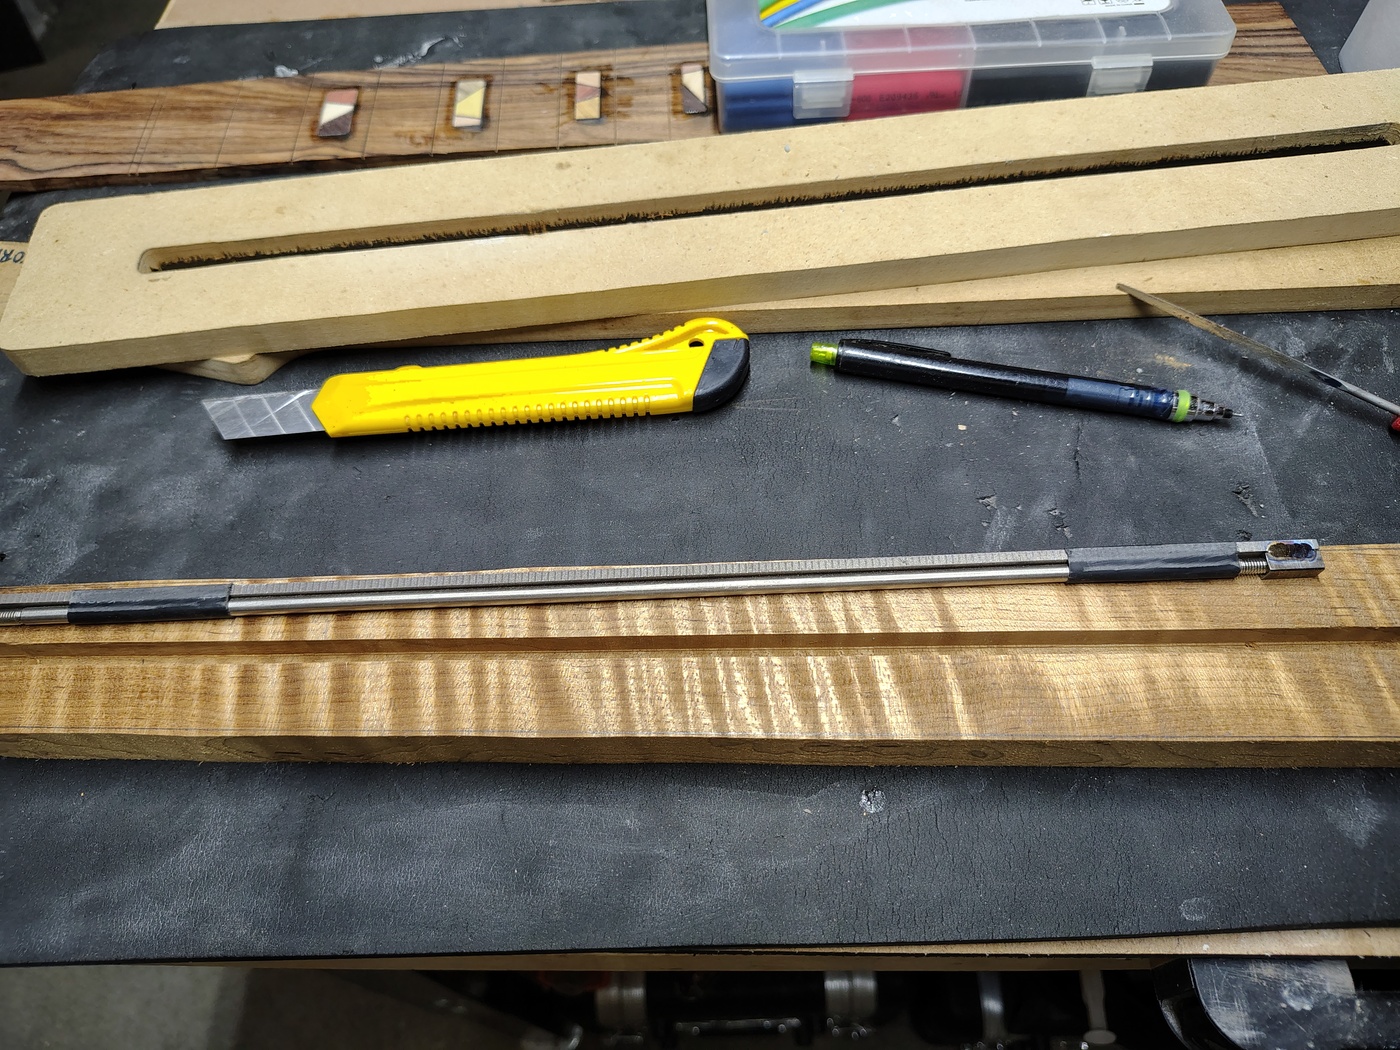
There's only one other thing you need for a neck and that's a truss rod. Now, I prefer double action truss rods because you can deal with bow in either direction. They're also easier to install. Double action truss rods tend to be a bit on the heavy side. StewMac's weigh close to 8 ounces. I recently found that Guyker started making a titanium allow dual action truss rod. I've bought six of them so far. They are slightly smaller than the StewMac rods. Guyker's are 6mm wide and StewMac's are 1/4" wide. So, a difference of 0.35mm. The StewMac rods are about $10 cheaper but they only come in one length. If you're making a short scale like I did they won't fit. Guyker's come in about 8 different lengths. Oh, and they weigh 2.5 ounces. In other words, they weigh just about the same as the maple you're removing for the truss rod. Also, they don't come with a plastic wrap but I use the big black heat shrink tubes from my heat shrink variety kit to dampen any vibrations (I've got nothing else to use them for).
×
![]()
Preparing the neck blank
If your neck blank is not completely straight use the Safe-T-Planer (or a regular planer) to take off “hump” side. When using the Safe-T-Planer you need to put a flat piece of wood under the neck blank. With a regular planer this won't be necessary.Once that side is flat, flip it over and plane the other side until the blank is 19.55 mm thick. That is assuming that your fretboard blank is 1/4" (6.35mm) thick. The goal is for the neck to end up 1" thick at the heel. If your fretboard blank is thinner than 1/4" then adjust the neck blank thickness. If it's thicker you need to plane it down to 1/4" thick. You could adjust the neck blank thickness to take the extra fretboard thickness into account but that could cause problems with the truss rod channel.
Make sure that both sides of the blank are perfectly (or as close as you can get it) flat.
Next you need to figure out where you want to cut your neck out of the blank, draw the neck outline on the blank with your template, mark the center line, figure out where your truss rod is going to be along the center line and mark each end.
Routing for the truss rod channel
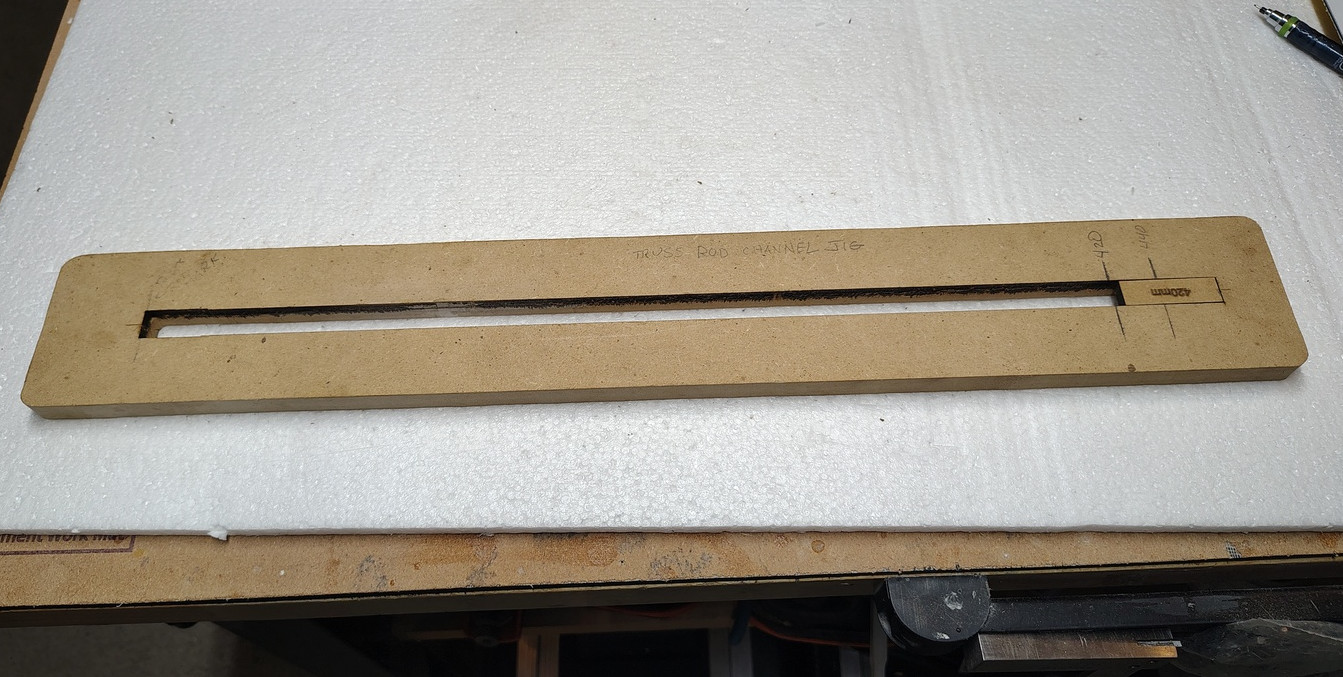
I have used two different methods to rout the truss rod channel. I used to use a router edge guide to rout the channel. This required that I mark the center line on the neck blank so that it was parallel with one of the edges of the neck blank. I would then make sure that the template wasn't going to hang over either edge at the headstock. If it was, I'd adjust and redraw the center line. Once the line was established I'd mark the ends of where I wanted the truss rod to go (which depends on whether you want peghead or heel truss rod access). I would then clamp the blank to my work surface and line up the router base and edge guide. I would use the clamps as end stops for the router. While this method works, it can be a bit cumbersome.What I do now is make a truss rod channel routing jig like the one in the following picture. They’re not hard to make but in order to use it you need to get a set of router bushings (and a router base that accepts bushings) before you make the jig. Unfortunately you probably can’t get just the one bushing that you need so you’ll have to buy a set. I got both the set (O'SKOOL Router Bushing Set) and the base (some crazy Amazon vendor named bushing compatible router sub base) on Amazon for a grand total of $42. Of course, you need to get a sub base that is compatible with your router. The bushing that I used from the set was O.D. 1/2” and I.D. 13/32”. This works for a 6mm truss rod but you might need to go up to the next size for a 1/4” truss rod. The main part of the channel in the template has to be the same size as the O.D. of the bushing. The top part (where the nut goes) has to be just slightly larger. Make sure you have an accurate center line marked on the template. As you can see in the picture, I made a block that goes in the channel to limit the length of the truss rod channel to match the size of the truss rod that I use.
×
![]()
Once you have the template made, position it on the neck blank, clamp them both to your work surface, and then rout the channel. Measure your truss rod to get the correct depth and check the not end because it is usually slightly deeper than the rest of the rod. You can square up the ends of the channel with a small chisel or use a Dremel router (the chisel is actually easier).
Caveat: Just as the battle plans never survive contact with the enemy, the truss rod channel never exactly matches where you've drawn the outline of the neck. After routing the channel, erase the neck outline, center the template on the truss rod channel, and redraw the neck outline.
Caveat 2: If you are going to use a peghead truss rod access hole, my recommendation is to put the end of the truss rod nut 9mm towards the peghead from the leading edge of the string nut location (which should be marked on the template and blank). If you are going to use heel access you want to make sure that you can get your truss rod wrench to the truss rod nut. I recommend using peghead access. It's just a bit more fiddly to do than the heel access but you won't have to remove the neck and make guesses as to how tight the nut has to be. With peghead access you can adjust the truss rod with the neck and strings in place.
Cutting the rough neck shape
Use a jig saw or band saw to cut the neck shape out of the blank. Try to get within about 1/8" of the outline. After that you can use the template and a Robo-Sander in your drill press to get it withing about 1/32" of the outline. The 2" x 2" Robo-Sander isn't that expensive and it's well worth the cost because you don't have any danger of tear-out and it makes the router's job of finishing up that much safer from tear-out.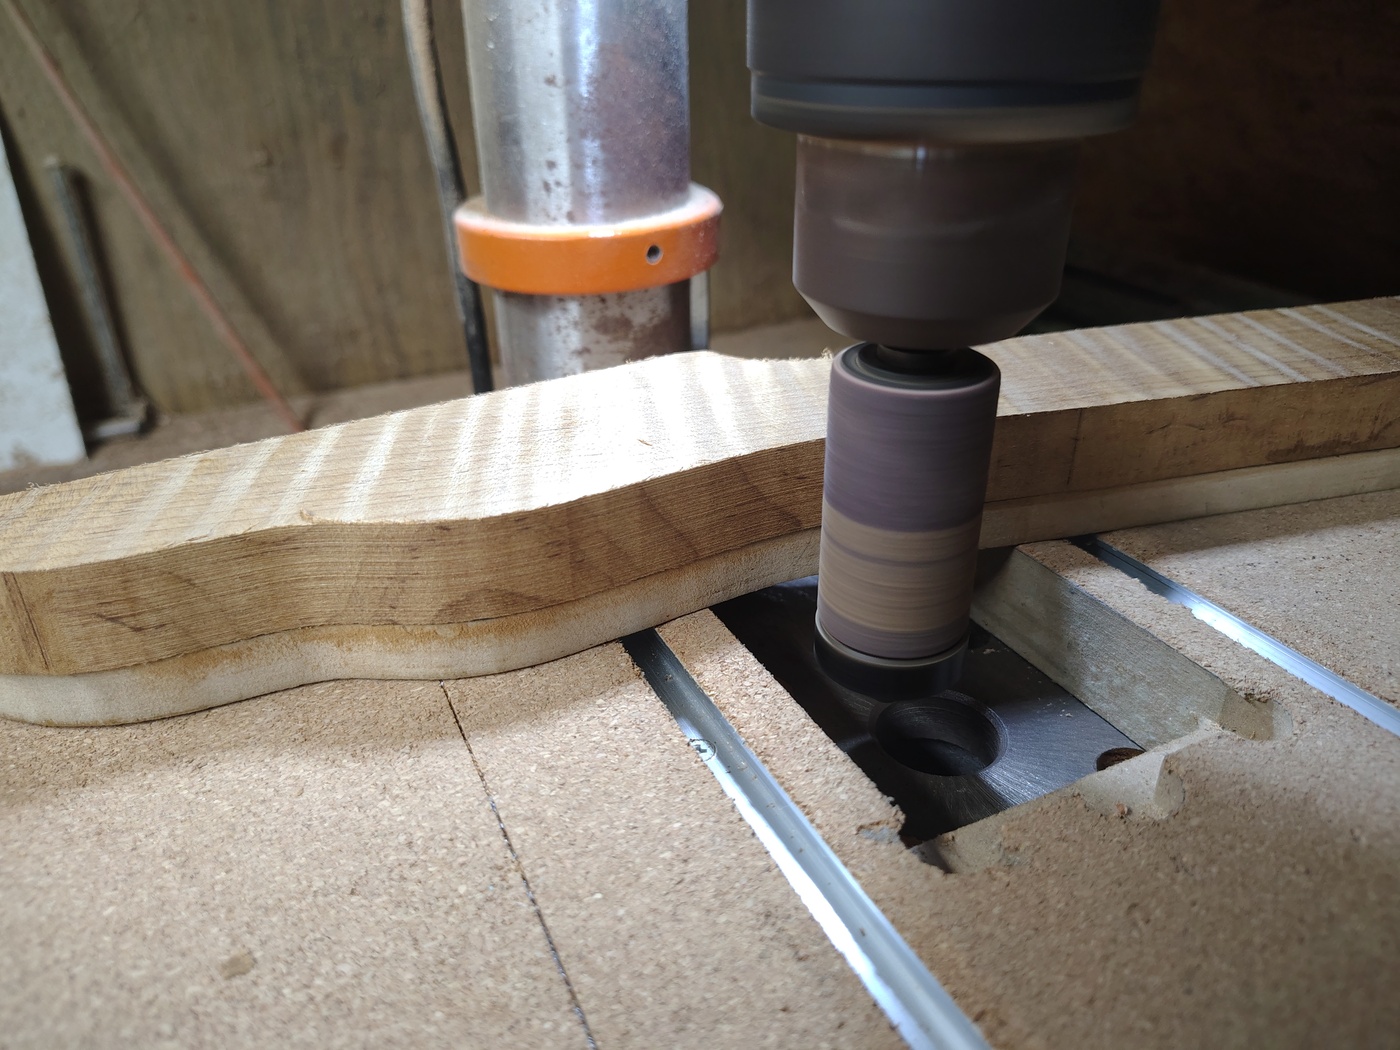
×
![]()
Thicknessing the peghead
At this point you need to draw what you want to be the final shape of your neck on the sides of the neck. If you have an existing neck that you like you can just use the measurements from that neck to design the new one. If you don't you can use the following as a start. At the first fret I want the neck thickness to be 13.75mm. At the 12th fret I like 15.75mm (this is assuming a 1/4" or 6.35mm fretboard - adjust as needed). This essentially what is known as “modern thin”. The curves from the peghead towards the nut and from the back of the peghead to the 13.75mm line at somewhere near the first fret are up to your artistic license. The same goes for the curve from somewhere near the 12th fret to the front of the neck heel. The edges of the neck heel should be 3" (about 76mm) from the end of the neck heel. I usually run the front edge of the neck heel curve out to about 3 and 3/4"" (94mm) from the neck heel. Again, artistic license. Only one of these lines will be used for thicknessing the peghead, the rest will be used later.There are two ways I've used to thickness the peghead. You can Safe-T-Plane the top of the peghead (don’t get too close to the nut location) so that it is 14mm thick (probably a bit thicker since you’ll have to sand the curve in and sand it down just a touch) and then hand sand the curve from the peghead towards the nut with with a random orbit sander). That works fine but it's a bit more labor intensive.
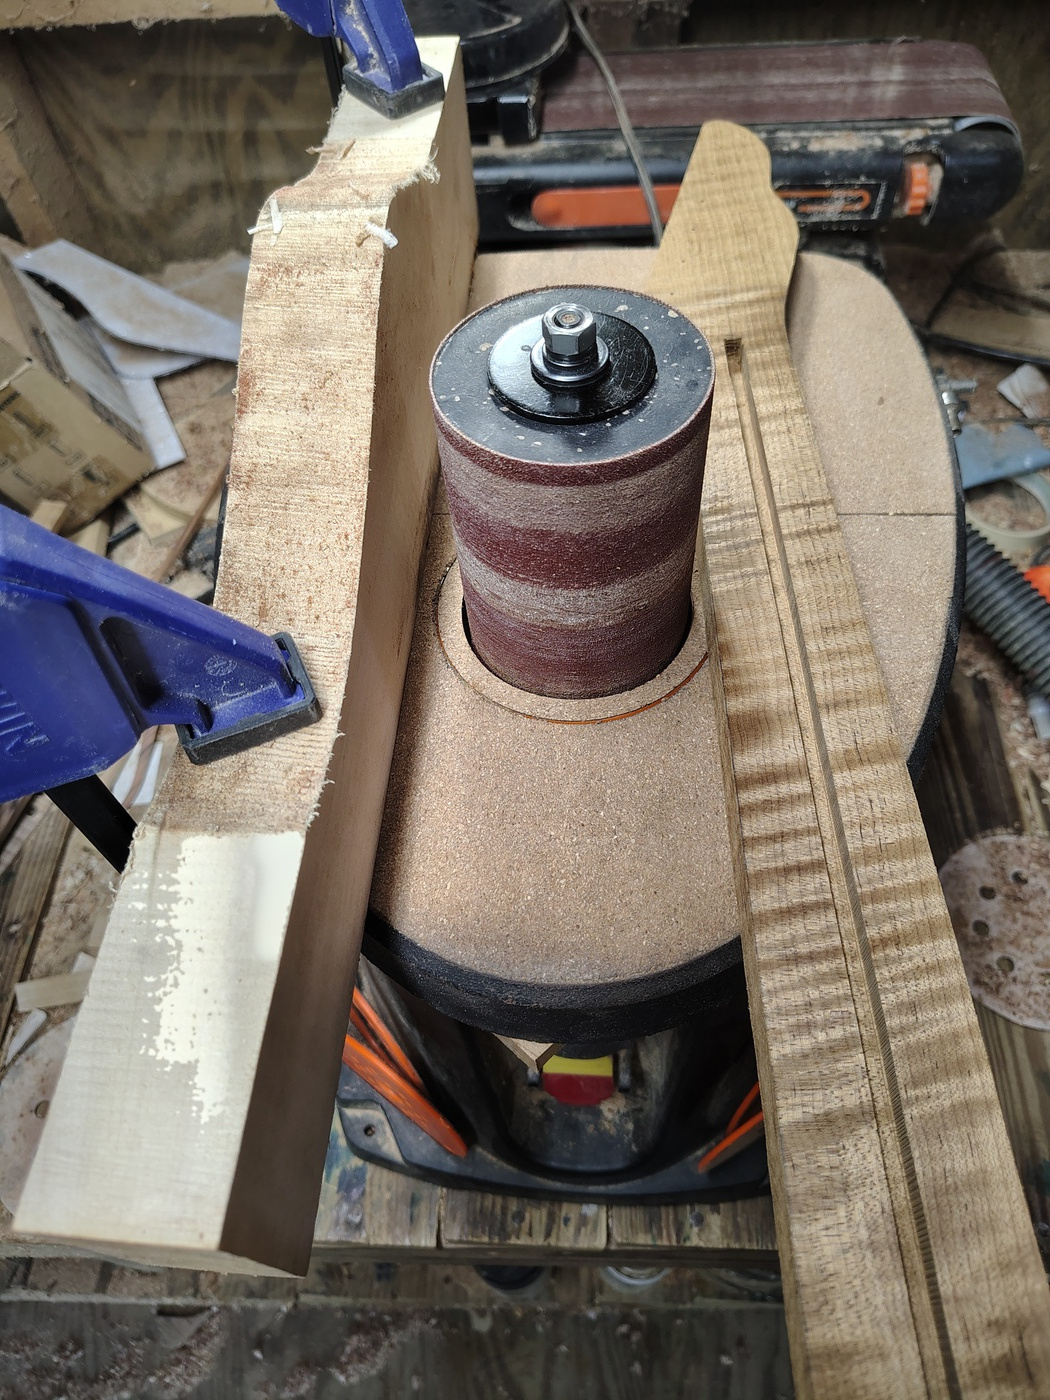
The second method, if you have an oscillating drum sander, is to set up a fence on the drum sander and sand the curve into the top of the peghead. Do this in small steps. Finish the curve from the top of the peghead toward the nut with a smaller diameter drum (than the one in the following image). Always go into the rotation of the drum unless you're really into shooting pieces of lumber around your shop. The advantage to doing it this way is that the peghead is almost ready for prime time when you're done.
×
![]()
Final shaping the neck outline
Now you need to shape the outline of the neck to it's final shape. Assuming you've used a Robo-Sander to get the entire shape very close to the final shape you can be a bit lax with what router bits you use. No matter what you need to go slow with the router. First, make sure the router is set to it's highest speed. Next, reattach the template to the neck blank and, using a router and a bottom bearing 1/4” flush trim router bit, rout the neck to the final shape. You might want to bump cut the heel and the curved part of the peghead (see Building a body, Rounding over and leveling the drop top for a description of bump cutting).
If you didn't use the Robo-Sander method you need to be more careful about grain direction when routing the edges of the neck and the heel. You need to use a bottom bearing bit on the upper side of the neck (the side that faces the player). Do not rout too close to the heel. You'll need to use a top bearing bit for the bottom side of the neck. Again, don't go too near the heel. You will definitely want to bump cut the heel and the curved part of the peghead.
Important note: Don’t use a router on the flat part of the peghead. Just use the oscillating drum sander (or your poor, tired arm and sandpaper) for the curved parts, and a sanding bar (of some sort) for the flat part.
Relieving the back of the neck
Unfortunately, I didn't take a picture of this little operation but it's not too difficult. First you need to mark straight lines across the back of the neck at the beginning of the curves that go up (or down depending on your point of view) to the peghead and up to the neck heel. These lines are the limit of where you want to use the Safe-T-Planer. Depending on the thicknesses you have set at the 12th fret and the heel you should have about a 2mm difference between them. You'll need some kind of flat spacer to lift the peghead end of the neck so that the slope of the back of the neck is flat to the drill press table. I use an old neck plate. Using a flat piece of wood or MDF set the neck blank face don on the wood with the spacer somewhere under the peghead end. Measuring from the flat board up to the marks at the first and 12th frets, slide the plate until these two points are the same distance above the board. Once that is done, mark the location of the neck plate (spacer) and then double side tape the spacer to the board and the neck to the spacer at the peghead end and the flat board at the heel end.Now, you're ready to start making wood chips. Chuck the Safe-T-Planer into the drill press and adjust it to just barely above the back of the neck at the mark on the peghead end (there will be more taken off at this end). When you tighten the drill press table down it will usually come up just enough to allow you to take off a little bit at a time. Moving the neck into the rotation of the Safe-T-Planer, take small cuts off of the back of the neck between the lines. Once you've cut off wood all the way across the neck, clean up the end lines. Keep doing this until you get down to the marks (actually, just a tiny bit above the marks since you're going to sand it).
There are other ways to do this manually but they're all pretty labor intensive and it's harder to get the back straight. Well, unless you have a huge band saw that doesn't drift.
Preparing the fretboard
Safe-T-Plane (or plane) the fingerboard blank down until it is 1/4” (6.35mm) thick. Rout (or laser) in the inlay recesses and/or drill the recesses for the dot markers. Mark the center (running through the inlay recesses if you added them). If you've bought a pre-slotted (and possibly pre-radiused fretboard), or if your fretboard blank is 1/4" thick, you can skip the planing.Slotting the fretboard
I use a StewMac fret slotting saw (only because, when I bought it, it was the only game in town — now you can get one for about half the price from Amazon) and a Solo Guitars fret slotting jig (about $100 cheaper than StewMac). You will also need a fret template for the fret slotting jig. Honestly, you don’t really need the fret slotting jig but it makes life easier. You can make your own single slot fret slotting jig out of plywood (sort of like a one angle miter box but much tighter so the saw doesn't wobble). This is how I did my first six guitars. Just measure and mark the locations of the frets and the nut. Make sure they are perpendicular to the center line! Then, saw the fret slots. You'll have to use a depth stop on the saw (most come with one).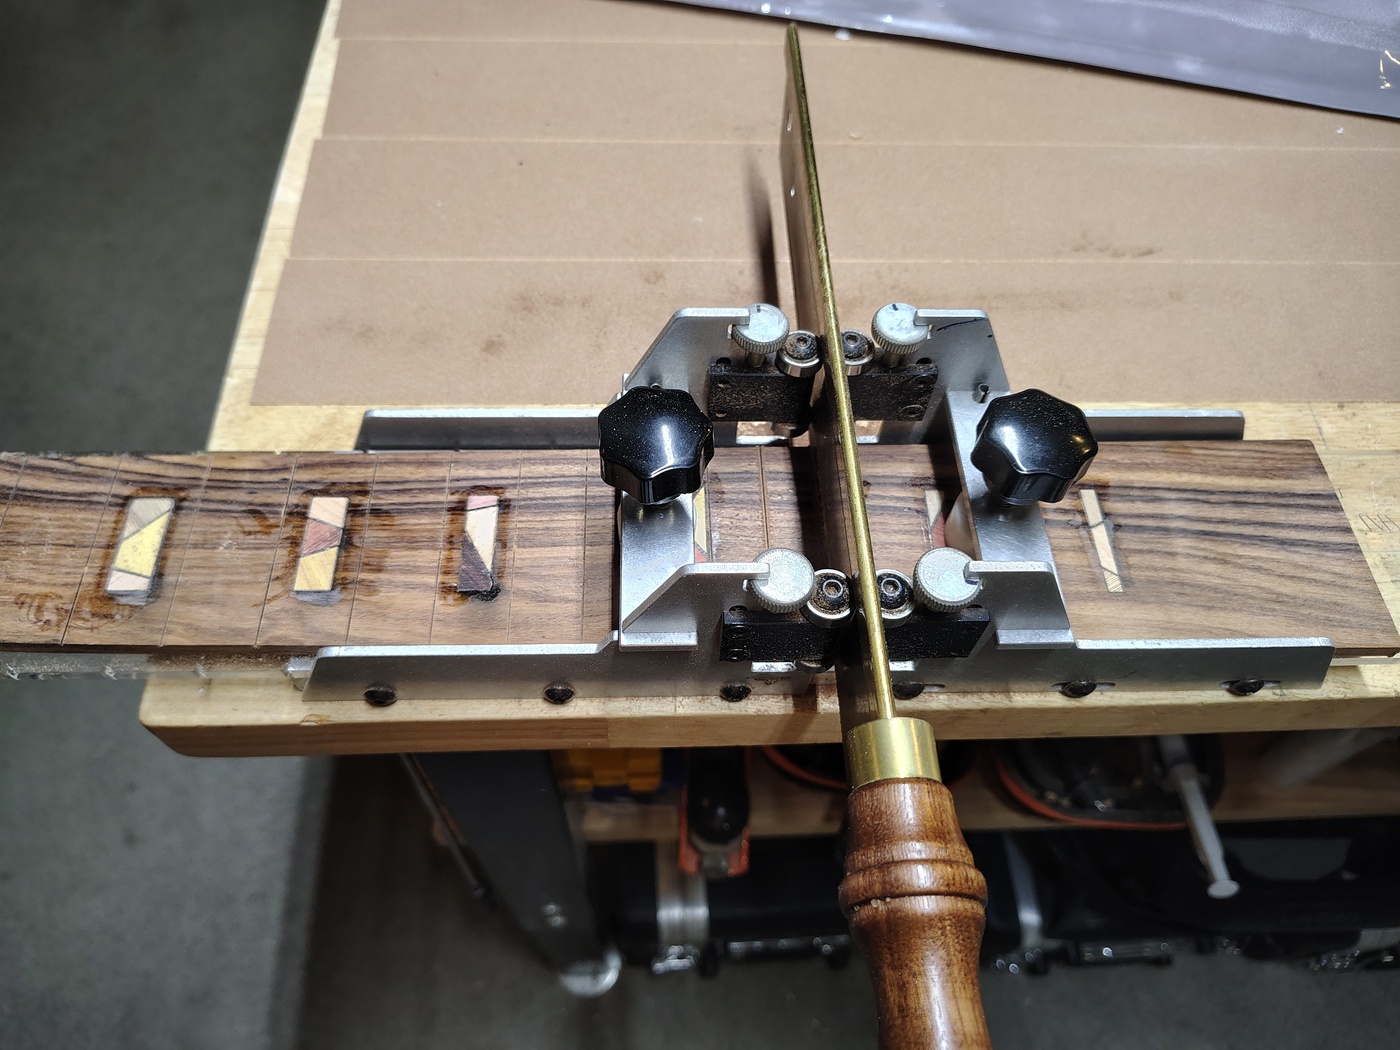
×
![]()
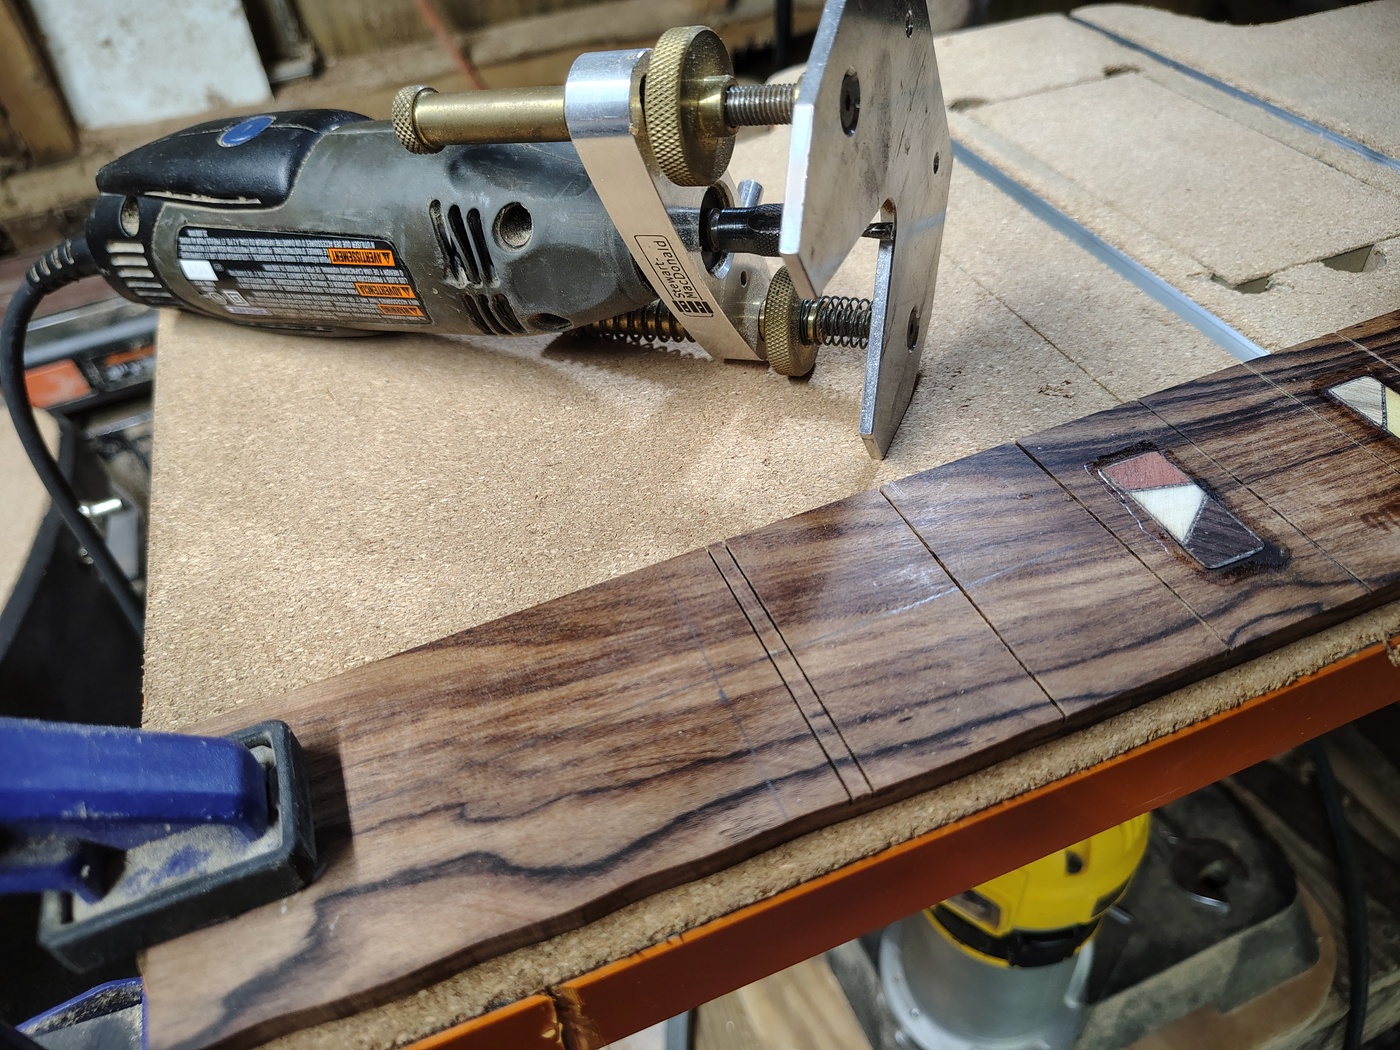
You need to cut the sides of the nut slot with the fret saw down to the depth that you want the nut. Then you can Dremel rout it out (very carefully) or use a tiny chisel to clear it.
×
![]()
Note that I got impatient and already glued the inlays in. This should normally be done later but I was dying to see how they would look.
Drilling the truss rod access hole
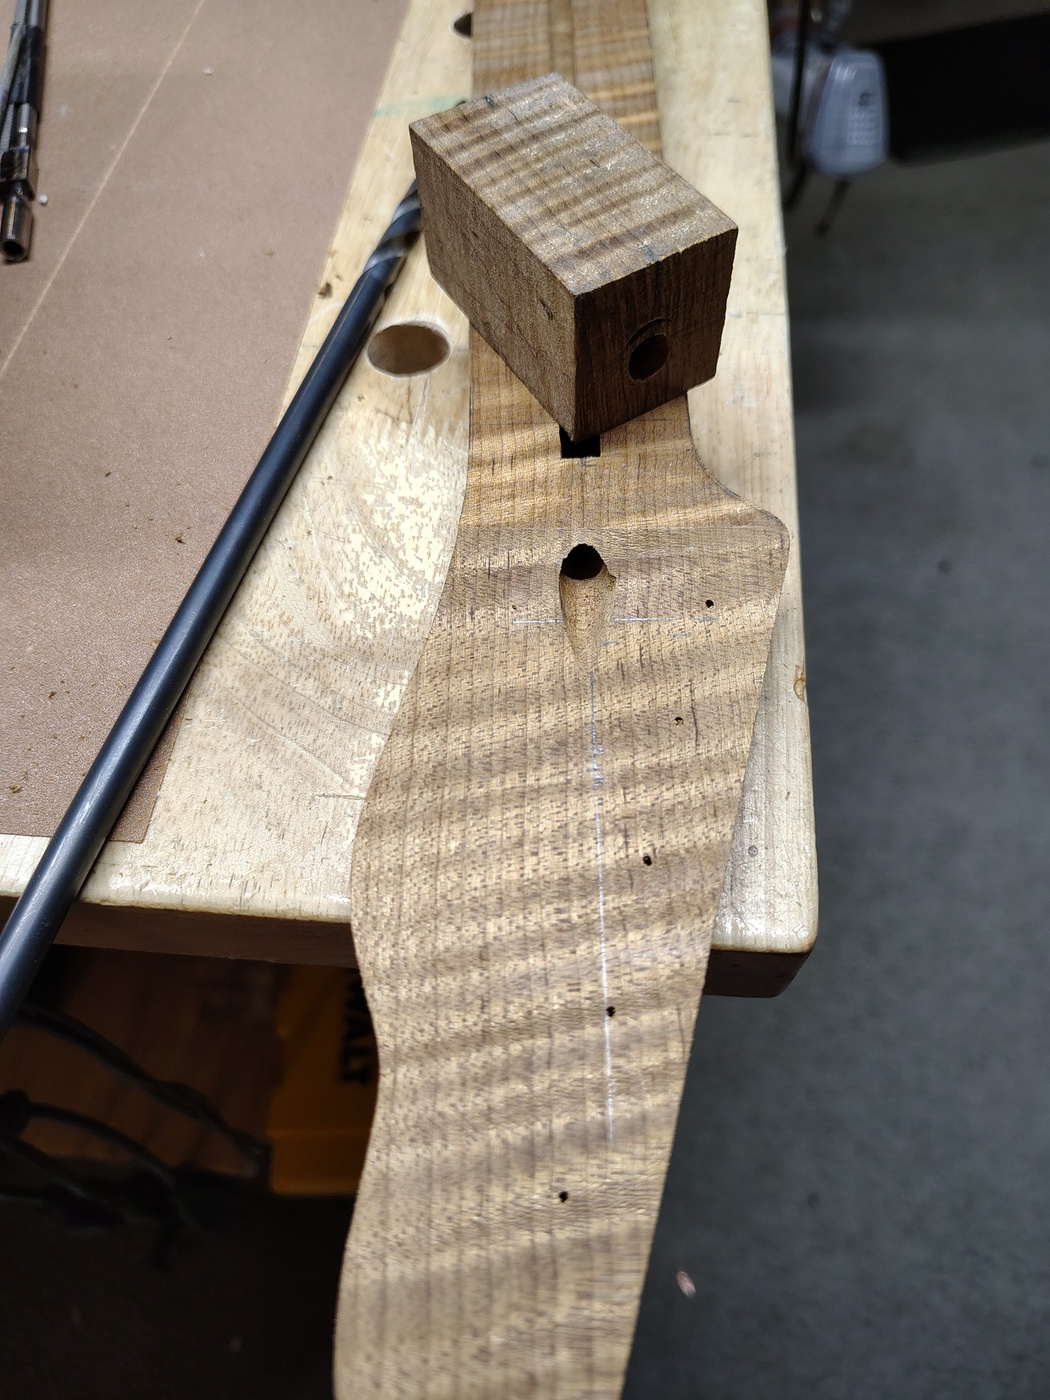
This is a PITA. I'm not going to cover neck heel truss rod access. There must be a million videos on YouTube showing how to do that. I've found two ways to do this fairly easily. Before you start though you need to mark on the side of the neck the location of the center of the truss rod nut when it's in the channel. This will give you something to aim for.Highline Guitars has a great short tutorial on drilling the truss rod access hole. Use a 1/4” or 5/16” brad point drill bit to start the hole then tilt it down. After the hole is started switch to an aircraft bit to finish it up. I've done this before but I find that I have a bit more control doing it the second way.
The second method requires a drilling jig that you can make from a small, rectangular wood block. I made mine by looking at the angle I'd need for the access hole (checkin the mark on the side of the neck and deciding where I wanted the hole), setting my drill press table to that angle, then drilling the hole through the block. I use a 5/16" bit. When you've got the jig made you need line it up on the center of the peghead and move it forward and back until the bit lines up with the center of the truss rod nut (measure a million times, drill once). Once you've got that, mark the location of the block. Now, clamp it and the neck to your bench. I put two clamps on top (one from each side and one on the peghead to the right of the front of the block to keep it from moving when the drill bit bites in. Then, very slowly drill the hole.
×
![]()
Gluing the fretboard to the neck
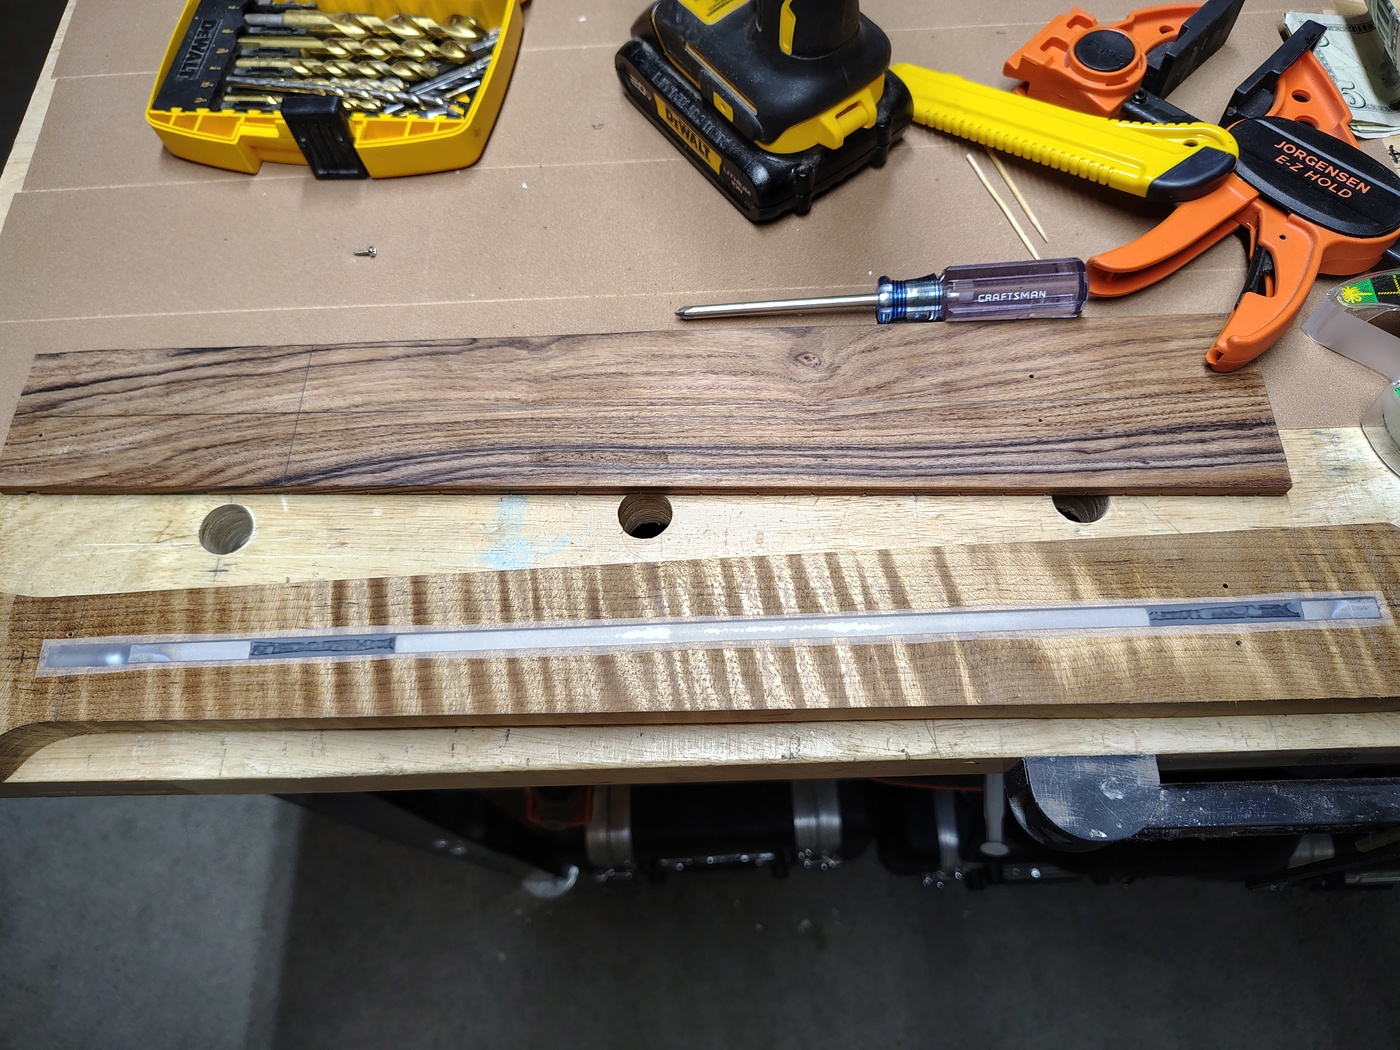
Center the fingerboard blank on the neck and line up the nut slot with the nut location mark on the blank. When it's all lined up, clamp it in place then check to see if it has moved any. If it has, adjust and repeat until it is right. Once it's clamped into place drill a 1/16” hole through the nut slot (off center). If you haven't jumped the gun and glued in the inlays (now who would be dumb enough to do that?) drill another 1/16" hole, off center, in one of the inlay recesses at or above the 12th fret. Use two very tiny screws to pin the fretboard in place. If you have a box of guitar screws and springs (available on Amazon) you can use the tiny little tuner screws. If, like me, you got impatient and inserted the inlays, you can drill two holes in one of the high fret slots and use a couple of toothpicks to hold it in place. Once the toothpicks are in place, cut them off flush with diagonal cutters. Make sure nothing slips after you clamp it. I don’t trust the toothpicks but, needs must when the devil drives.Place a strip of Scotch tape over the truss rod so no glue gets in the truss rod channel. Cut it down to the smallest area you can. You can leave the scotch tape in place. It is so thin that it will have no effect on the fingerboard and the adhesive is weak and will harden in a very short period of time so it won’t interfere with the truss rod.
×
![]()
Once you’ve got the fingerboard in place it's time to glue it down. I use Titebond original glue for this.
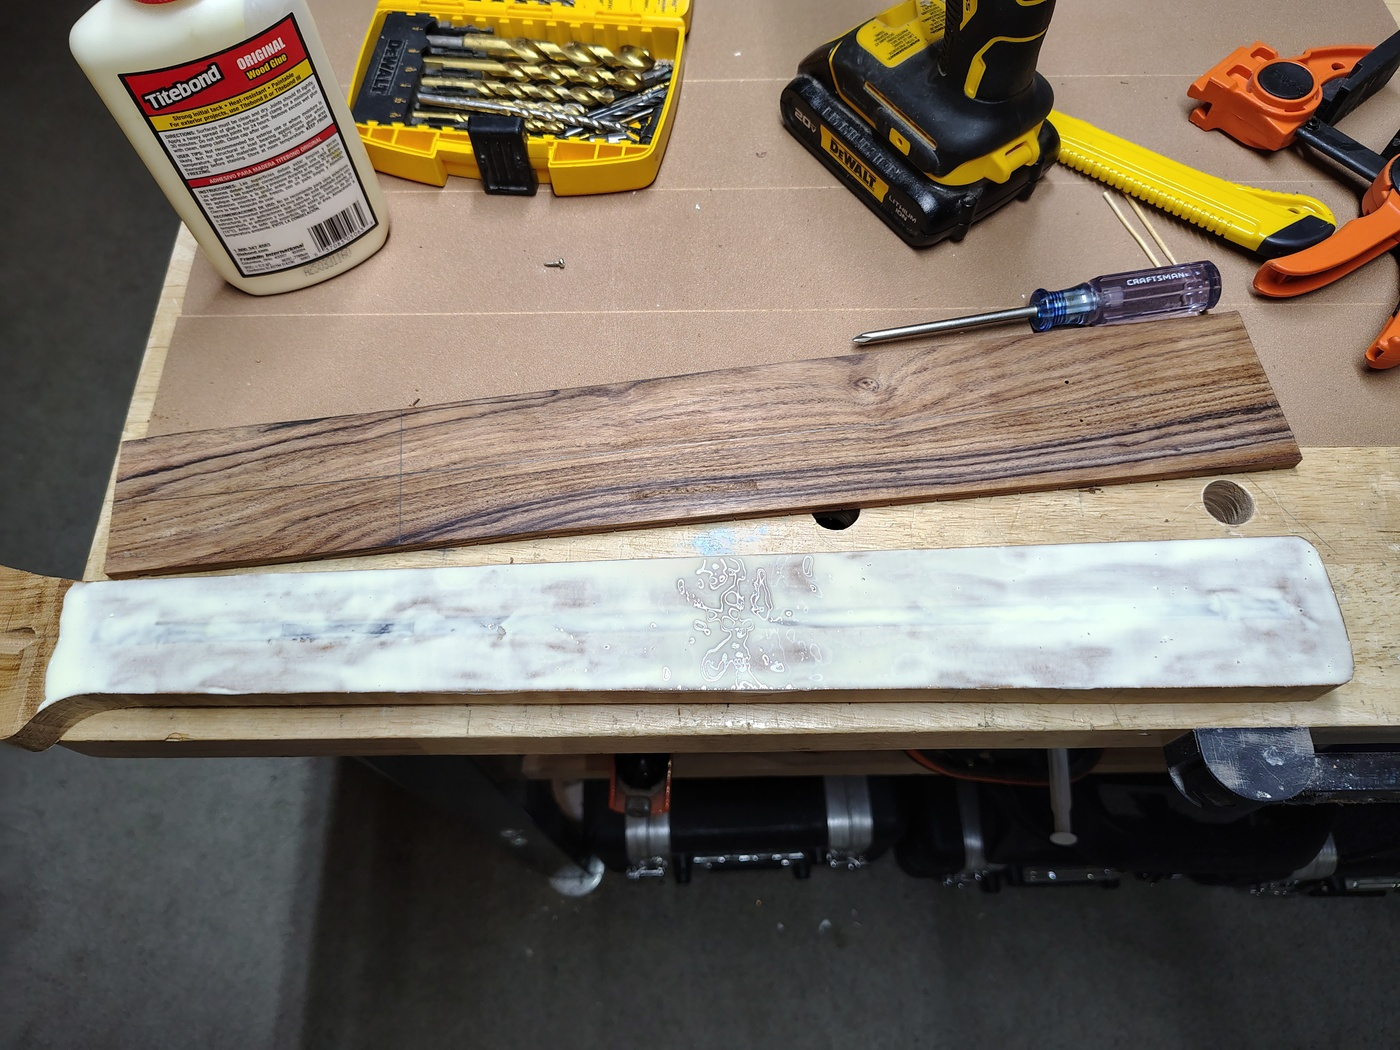
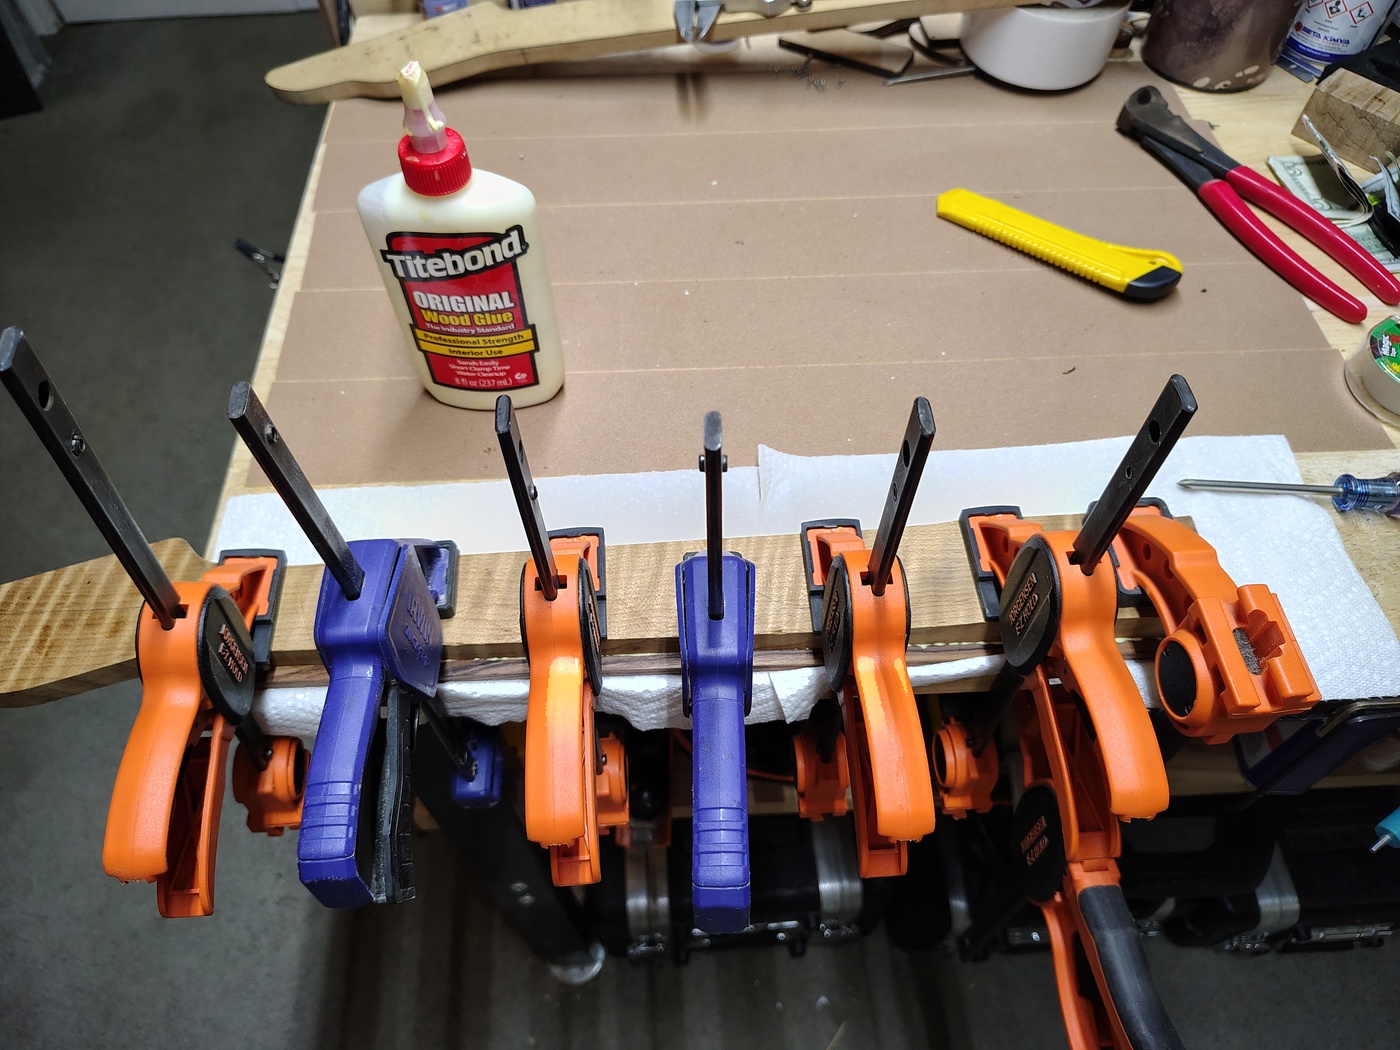
I like to turn the neck face down on the edge of my bench and then clamp it in place. You can clean up some of the squeeze out before clamping and try to get the rest afterwards.
×
![]()
Leave it for at least three hours so that the glue will set up then remove the screw(s).
Rough cutting the fretboard to the neck shape
Use a band saw or jig saw to cut off the excess fretboard as near to the neck as possible. Do not cut off the fretboard overhang at the neck heel. For conversion necks or if you want 22 frets there will be some overhang. You can hand shape this last part later. Using the neck blank as a template you can use the Robo-Sander to get it almost flush with the neck.Installing fret inlays or markers
If you already cut recesses for your fretboard inlays (and you didn't already install them like a Bozo) now is the time to put them in. If you cut the inlays and the recesses using a laser everything should be almost perfect. I usually hand press the inlays in and then tap them with the rubber dead blow hammer to seat them. Once they're seated you can just use thin CA glue to glue them in. That assumes that you're going to finish the fretboard with CA glue. If you're not then use Titebond.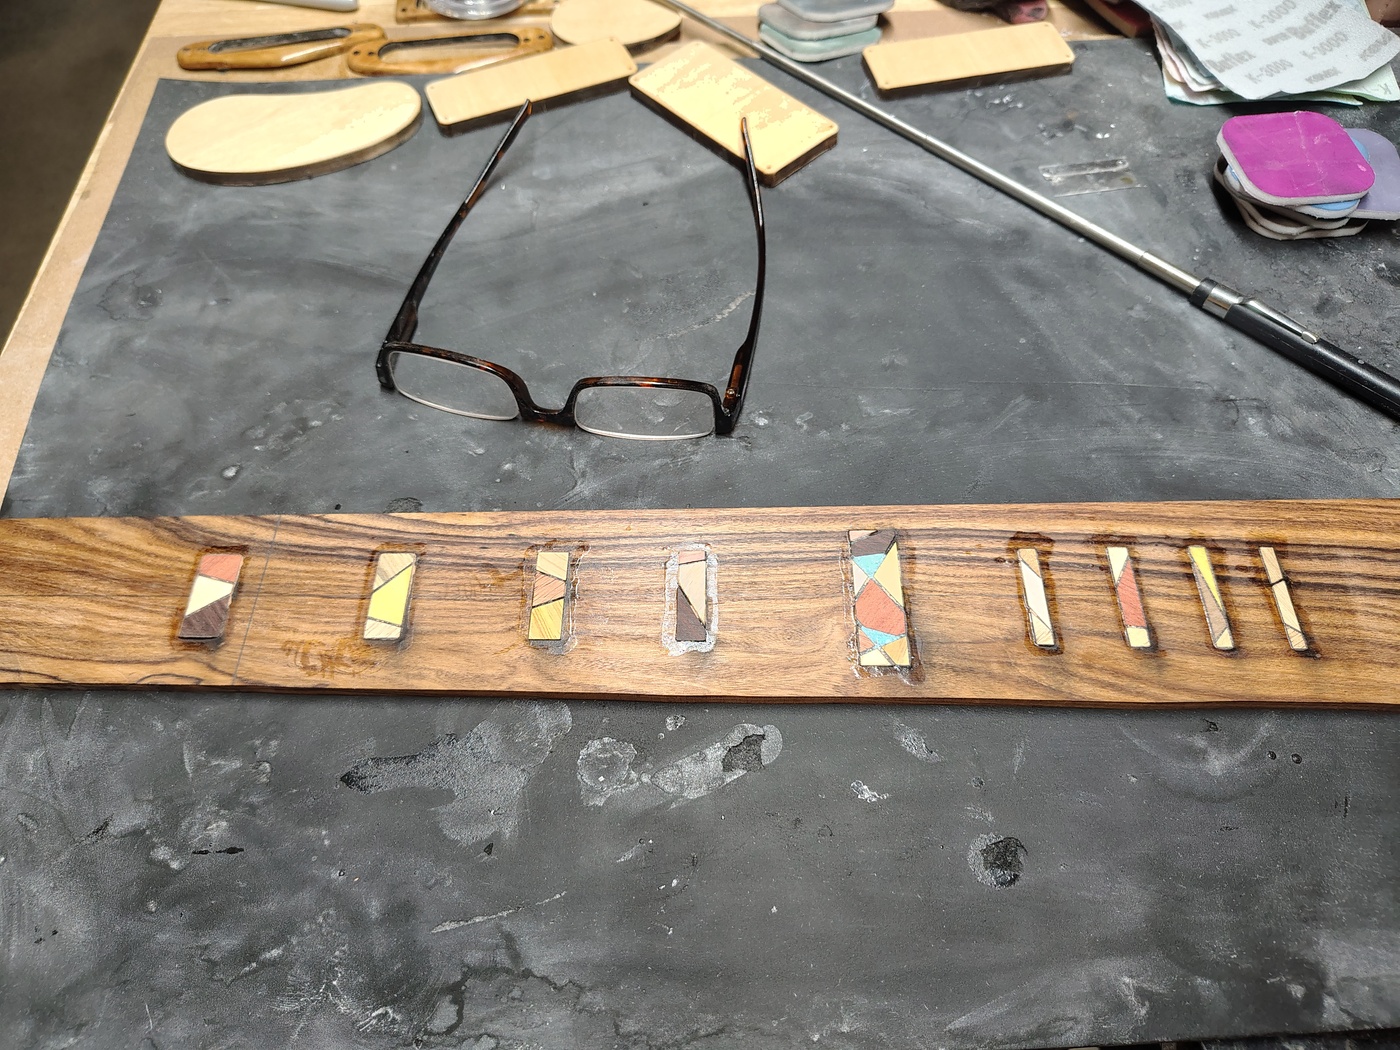
×
![]()
If you hand cut the inlays and made the recesses with a Dremel router mix some Titebond with sawdust and use that to glue in the inlays. The sawdust and glue mixture will always dry much darker than the dust so you might want to use lighter wood dust. Mix a bit up and let it dry to see how it will look.
Shaping the peghead to fretboard curve
If you have an oscillating drum sander you can use the same method covered in Thicknessing the peghead to clean up the end of the fretboard over the peghead. If you don't have one you can use (very carefully) a random orbit sander or you can do it the old fashioned way with elbow grease.Shaping the back of the neck
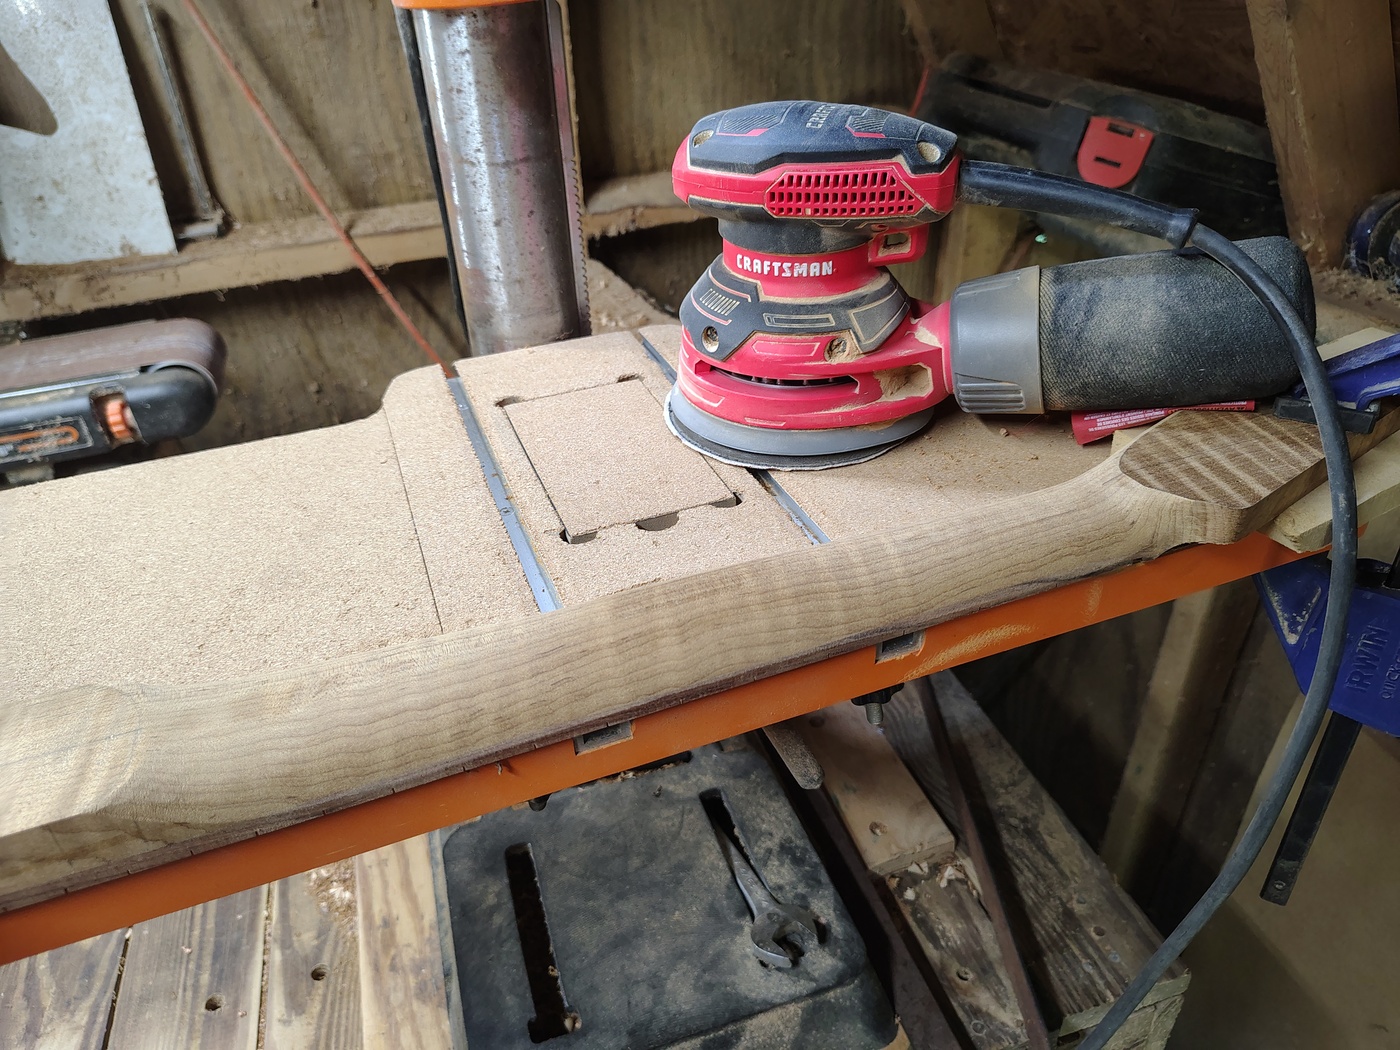
There are a million ways to shape the back of the neck. You can use whatever implements of destruction you desire. I find that a half inch round over router bit, oscillating drum sander, and random orbit sander can do the entire job very easily — although you could also use a surform, wood rasp, draw knife, spokeshave, Japanese rasp saw, Barlow pocket knife, or three or four very well trained beavers. I draw a line down the center of the Safe-T-Planed part of the neck and try to leave that until the end so that the back of the neck is flat.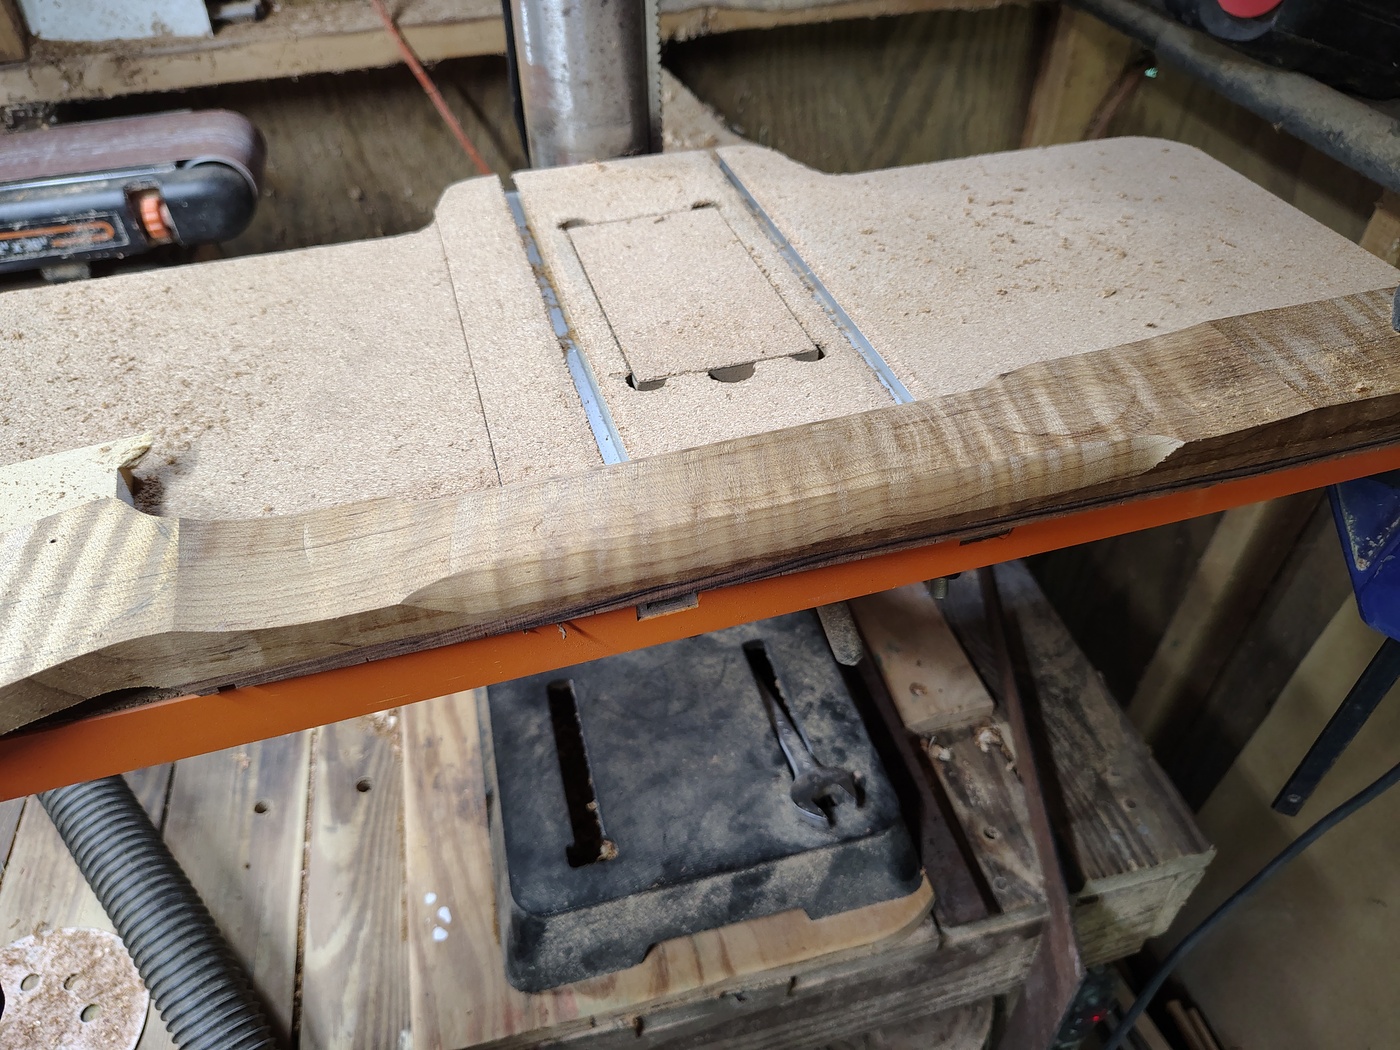
×
![]()
My ideal thicknesses are 19.9mm at the first fret (measured just above the fret), 20.27mm at the 5th fret, 21.1mm at the 9th fret, and 23.17 at the 12th fret. That’s just me, shape it to whatever feels right for you. There are no hard and fast rules for this.
×
![]()
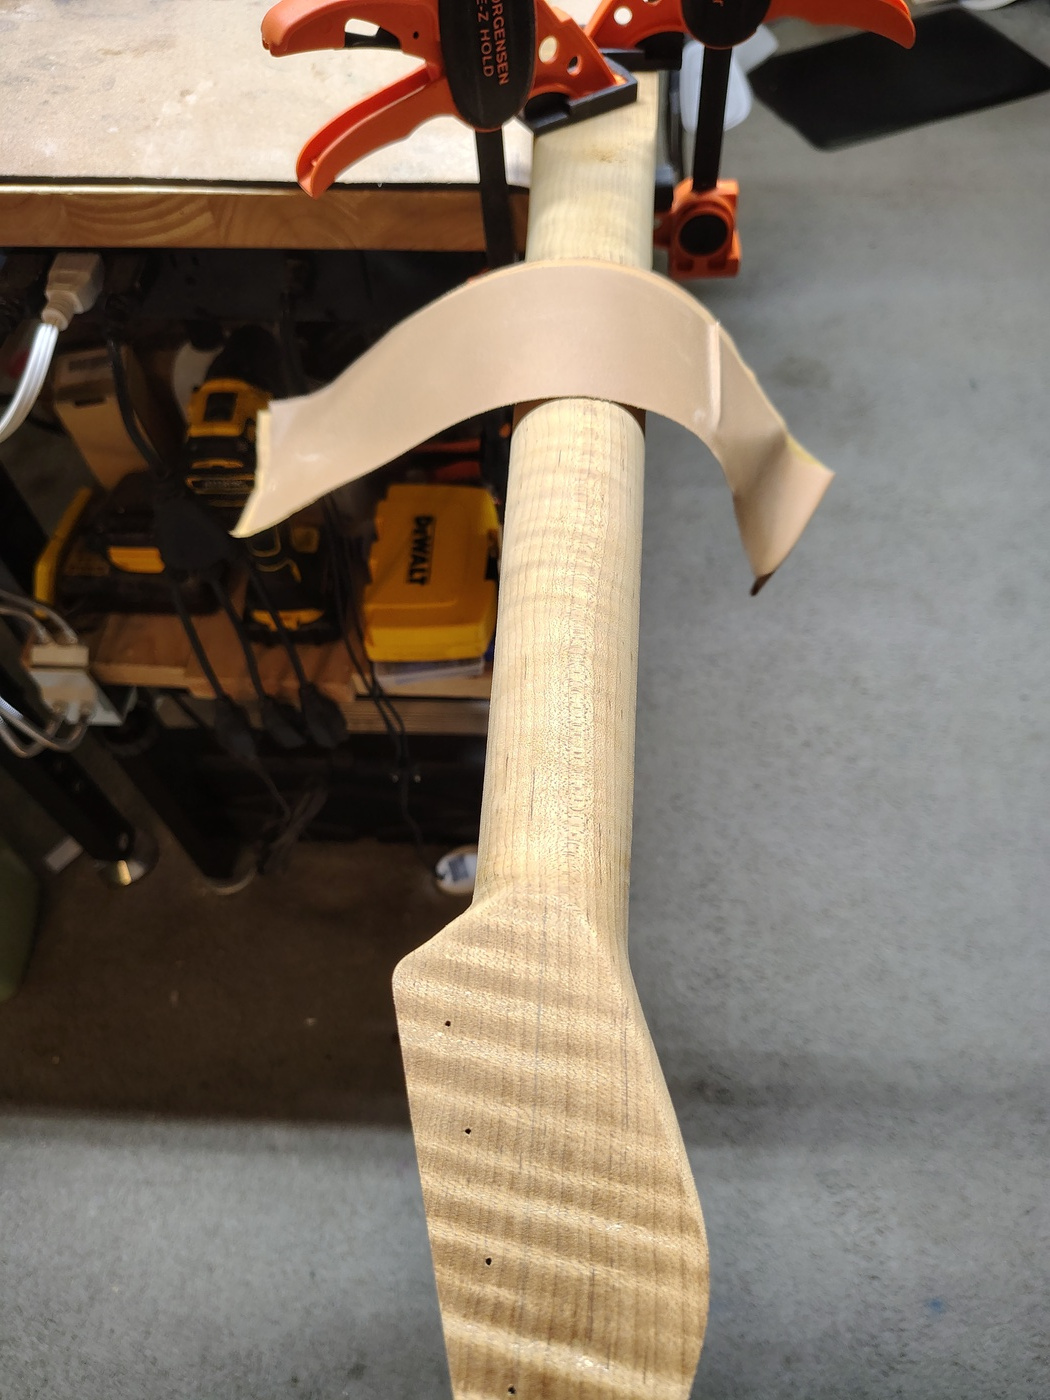
I use the oscillating drum sander to round the back of the neck to the peghead and the neck heel. I used to do this with the random orbit sander though so it's not a big deal. I have found one little trick that helps to get the back of the neck round (assuming that's the shape you're going for). Clamp the neck by the heel to your bench then take a length of 120 grit peel-and-stick sandpaper and use it like your shining shoes.
×
![]()
After all that you'll need to hand sand it with 120, 220 or 240, and then 320 grit sandpaper. You can use the soft pads for most of the neck but use a solid backing block on the front and back of the peghead as well as on the neck heel. At that point I tend to leave the neck sitting around for a day or two just so I can look at it from different angles. You'll be amazed at what you can miss by getting in a hurry. Once you're satisfied with the shape, dampen the neck (not the fretboard), let it dry, and then sand it again with 320 to get rid of the fuzz.
Peghead and neck heel logos
In the past I've done water slide decals but now that I have a laser I use it to inlay the peghead logo and the neck heel logo. Just for the heck of it, here is how I do it. I design the logo in GIMP and then import it to LightBurn. In Lightburn I trace the logo. I also import the peghead outline and position the logo in the peghead. I make the logo the red layer and I make the peghead outline the black layer. That way I can burn whichever one I need.First, I take the shield off of the laser because otherwise it will hit the fretboard. I have laser safe glasses so I don't need the shield. Next, I put a sheet of paper on the laser platform and hold it down with small magnets. I set the laser height for the paper and then draw the peghead outline. After it's done, turn off the output for the black layer.
I put a layer of blue masking tape on the peghead in the location that the logo is going to go. I then set the neck on the laser platform and very carefully adjust the height of the laser for the peghead. Using the positioning buttons in the Move tab I move the laser head north (for want of a better word) of the peghead. I go into Edit->Device Settings and I turn off Return to Finish Position. I then set the red layer (the logo) to Line, 1800, 1 pass, and 15% power. At that point I Start the laser and let it burn the outline of the logo in the masking tape. At that speed and intensity it won't cut through the masking tape. When it's done (the laser head won't return to the start position), check to see if the logo is where you want it. If not, adjust and try again. Once it's where you want it, change the red layer settings to Fill, 1800, 90%, and 2 passes (this is for a maple neck). Very carefully, without moving either the peghead or the laser head, remove the masking tape. Finally, Start the laser. This will burn the recess for the logo. Normally I would cut the letters by setting the red layer to Line, 300, and the normal pass and power settings for whatever type of wood I was using for the inlay. In the case of this guitar I decided to fill the logo with crushed turquoise.
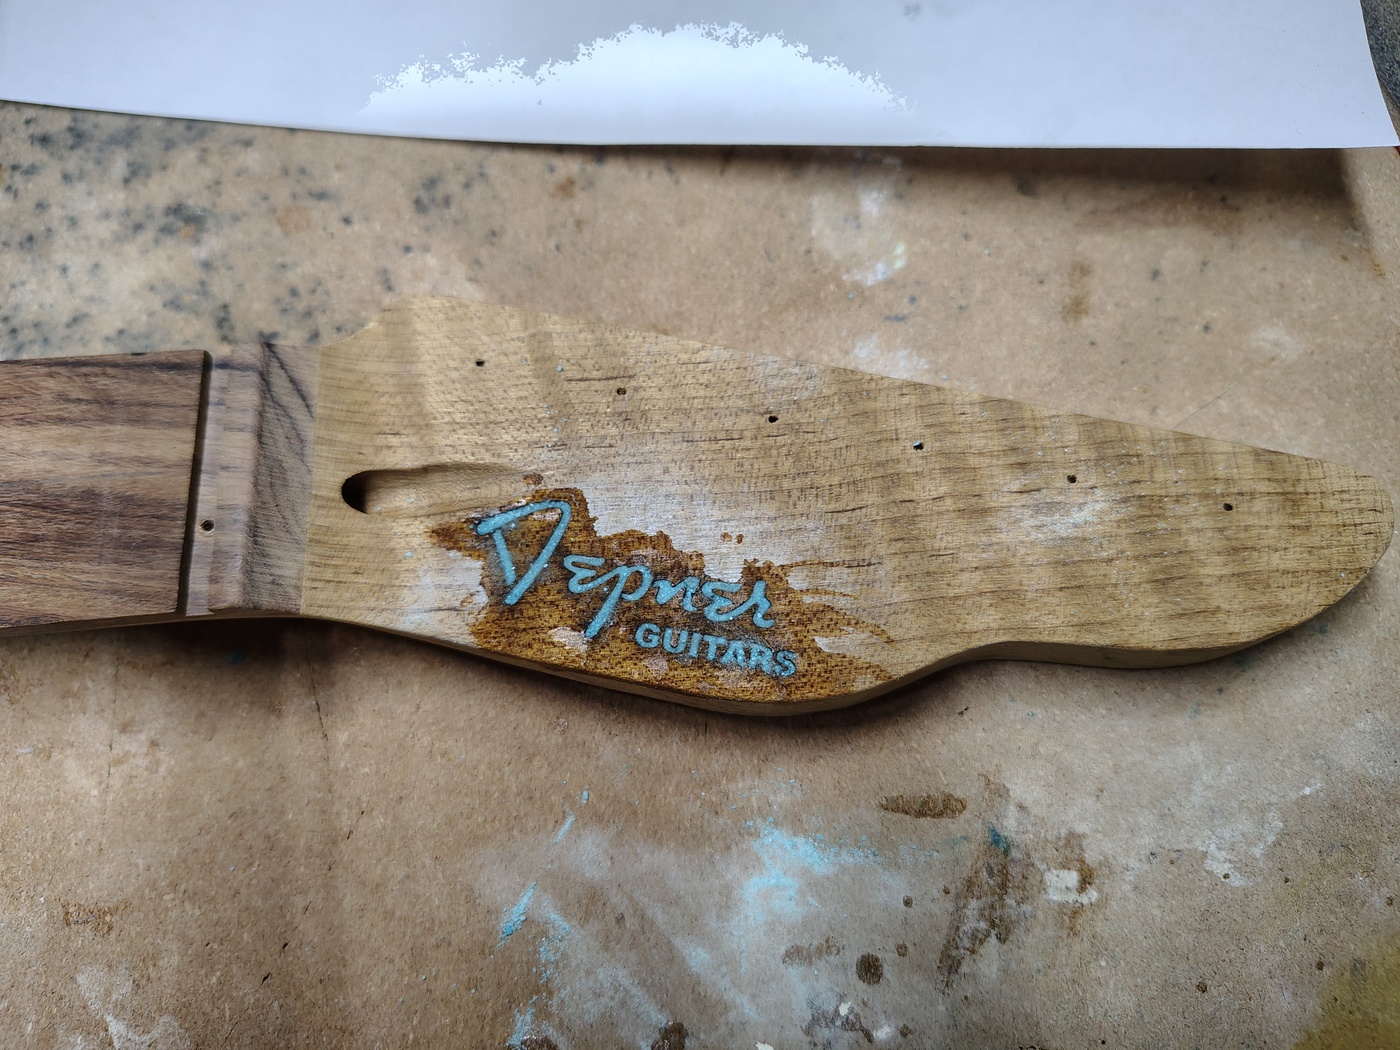
×
![]()
When it dries you can sand it down smooth. For the turquoise I started with a razor blade scraper because that stuff is hard.
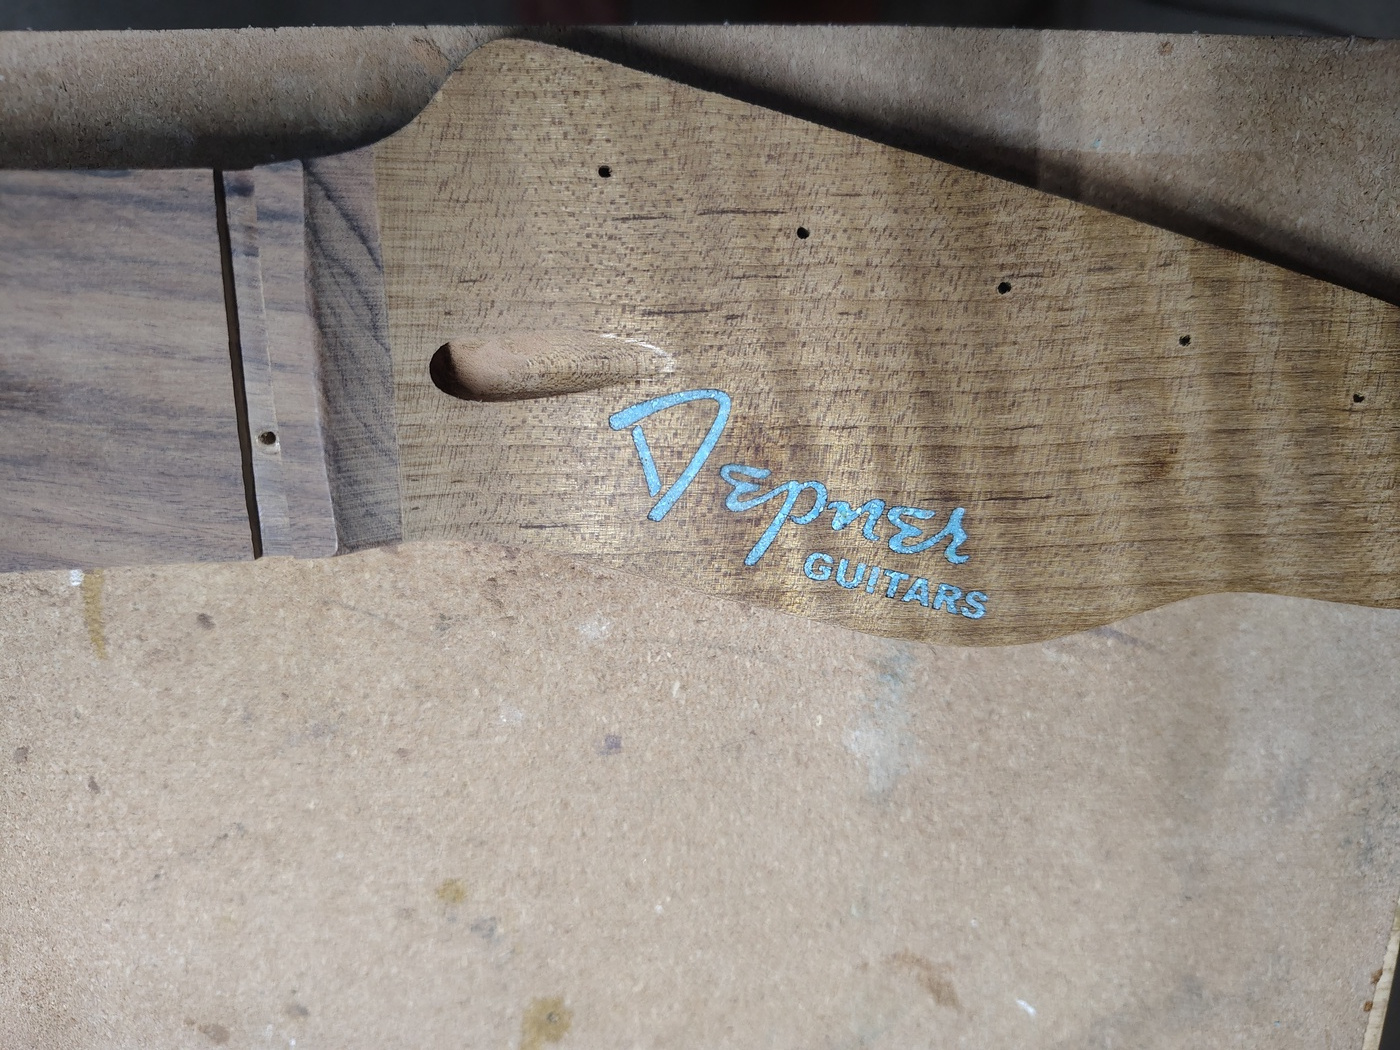
×
![]()
You can do the neck heel logo in very much the same way.
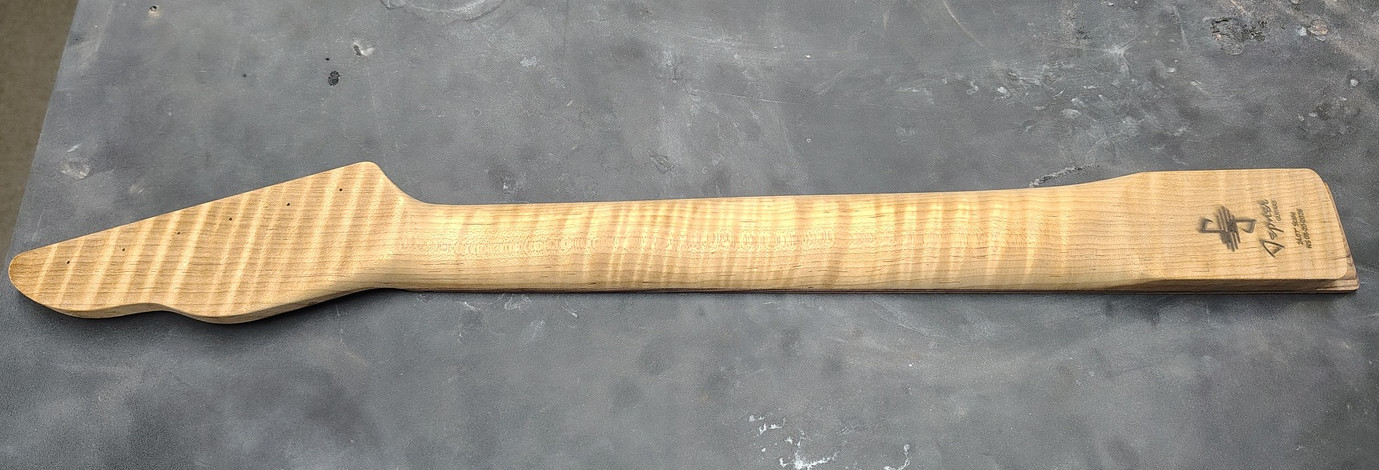
×
![]()
Before you start burning things on the neck test them out on a piece of scrap wood.
Radiusing the fretboard
Before you radius the fretboard, check the truss rod and make sure the neck is flat! If you aren’t using a pre-slotted pre-radiused fretboard, radius the fretboard using a radius sanding block (I got a very good Guyker aluminum one on Amazon) and peel and stick sandpaper. Always sand the surface of the fretboard flat before radiusing if it isn't already flat. I use Gold peel-and-stick sandpaper stuck to the top of my bench (which is very flat) to sand the surface. Put some pencil marks on the fretboard and then sand until they disappear. I use 120, 220, 320, 400, and then hit it with some #0000 steel wool to clean it up.I've seen jigs for radiusing the fretboard. They're designed to keep the radius block straight. I have found that it's just as easy to clamp the peghead to your bench (in two places) and just do it by hand. Don't get in hurry and keep the block straight and you shouldn't have any problems.
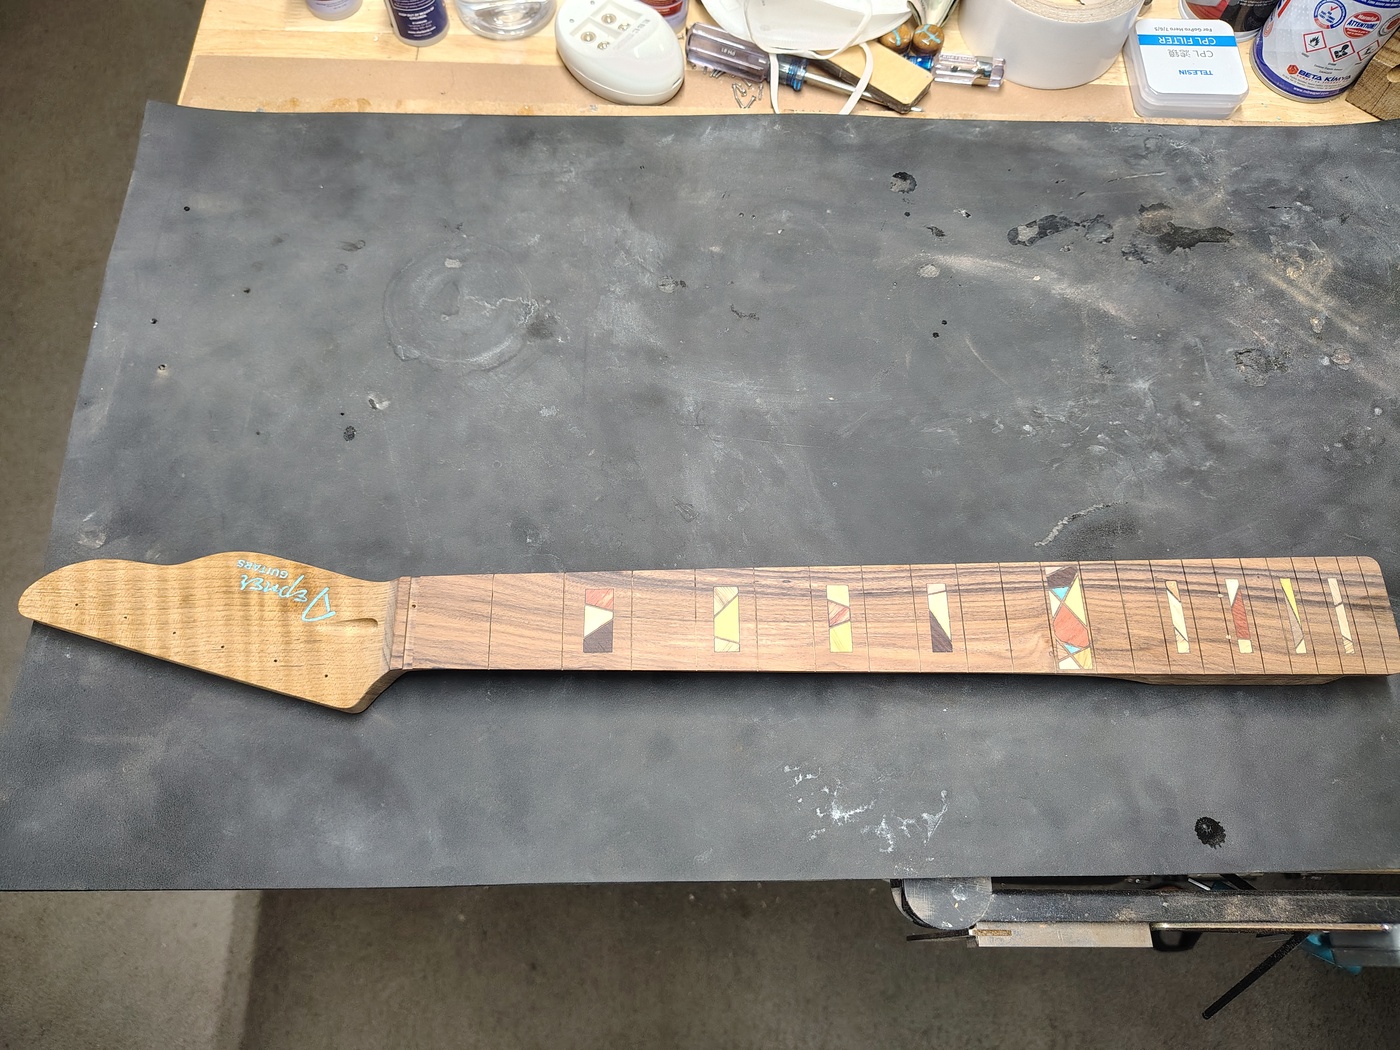
×
![]()
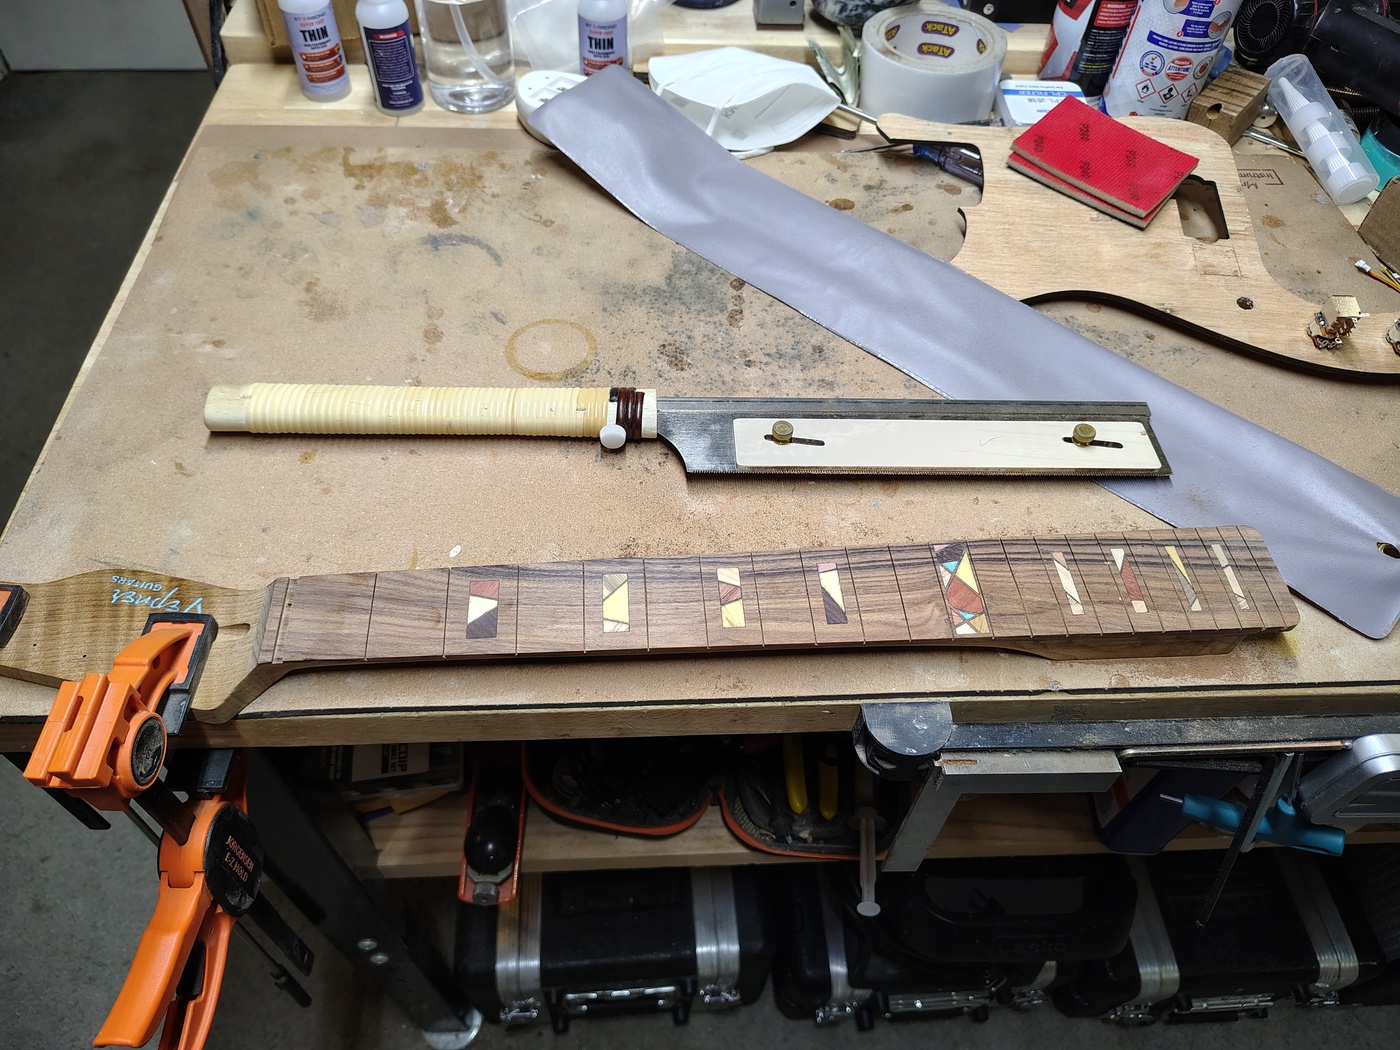
Once you've radiused the fretboard you will need to cut the frets again since the edges are now shallower than the center. Use a saw with a depth guide. I use my Japanese fret saw but I used to use the normal fret saw and it works fine as well.
×
![]()
Finishing the fretboard
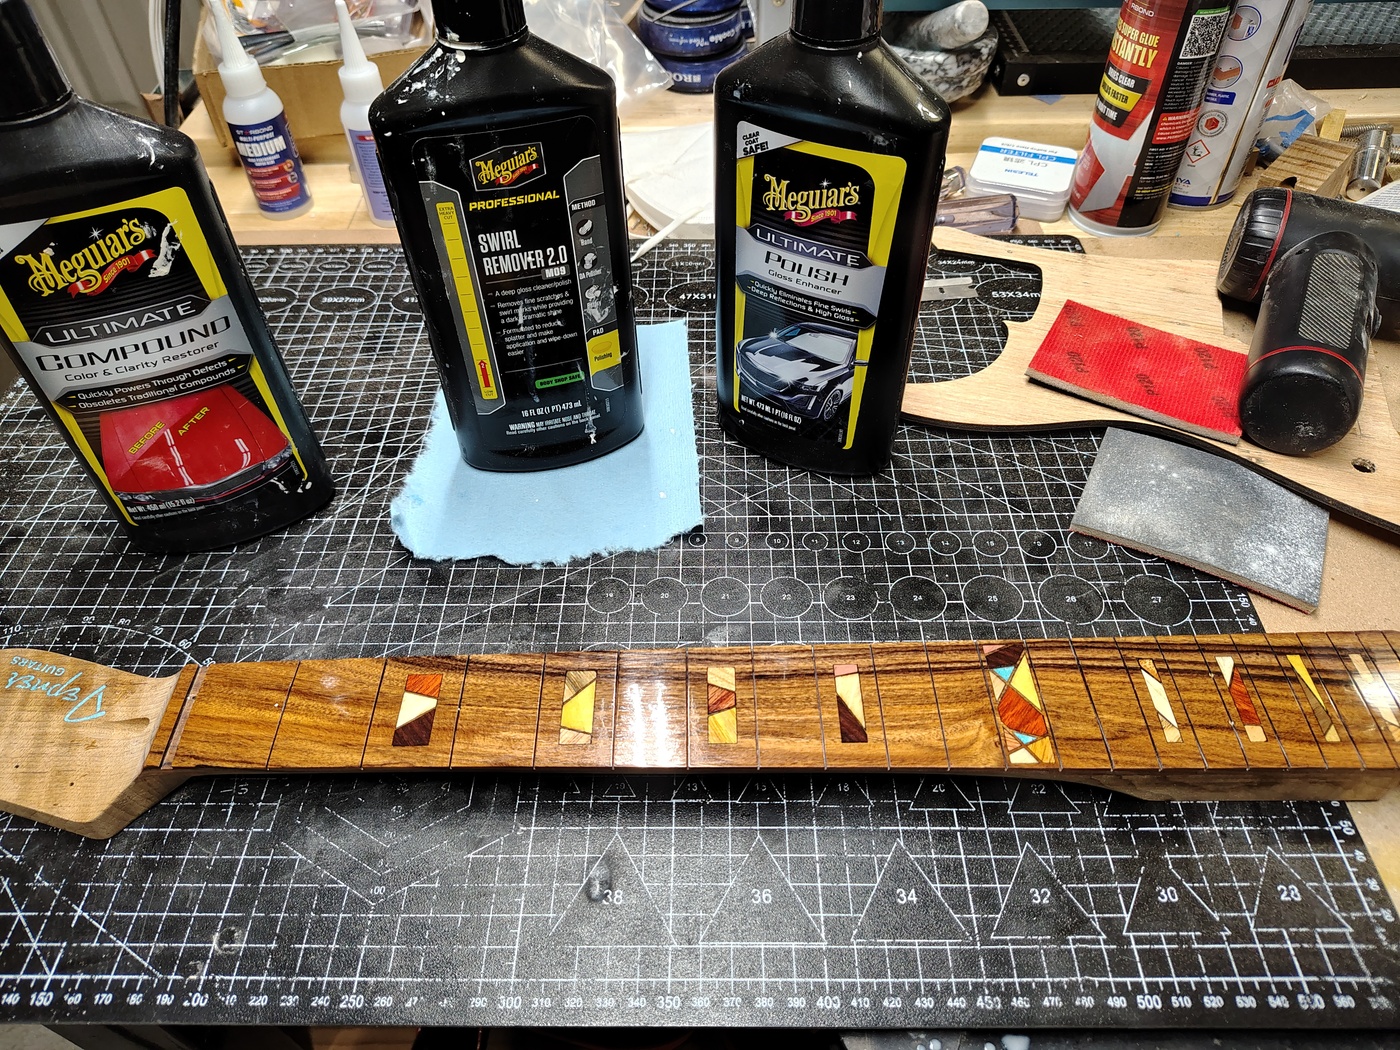
First things first, check the neck for dings or deep scratches and then sand it down to somewhere between 320 and 400 grit. Next, wipe it down with denatured alcohol to remove any dust. After that you just follow the finish schedule detailed in Sanding and finishing. Be careful to avoid getting CA glue anywhere but the fretboard.
×
![]()
When you're done finishing the fretboard you have to slot it again to make sure there isn't any glue in the fret slots.
Insert side dot markers
You can use the drill press or a hand drill to drill the side dot holes. I have used use 3mm Luminlay for quite a while but it's a bit expensive. I've finally run out of Luminlay with this guitar so from now on I will use the laser to cut 3mm dots out of 1/8" aspen (Ocooch Hardwoods).You can glue the side dots in with CA glue if that is what you're using to finish the neck. If not, use Titebond. When they are set, clip off any excess with fret end cutters or diagonal cutters. Sand them fairly flat with the fret leveling bar and sandpaper. Don’t worry about getting them too perfect. They’ll clean up when you file the fret ends.
Install the frets
Install the frets. Boy, that covers a lot of territory doesn’t it!?First thing to know is that the fret wire needs to be at a slightly smaller radius than the fretboard. This helps to seat the frets better. For example, I like a 16" radius fretboard but I use 12" radius fret wire (or fret pieces if you buy a set).
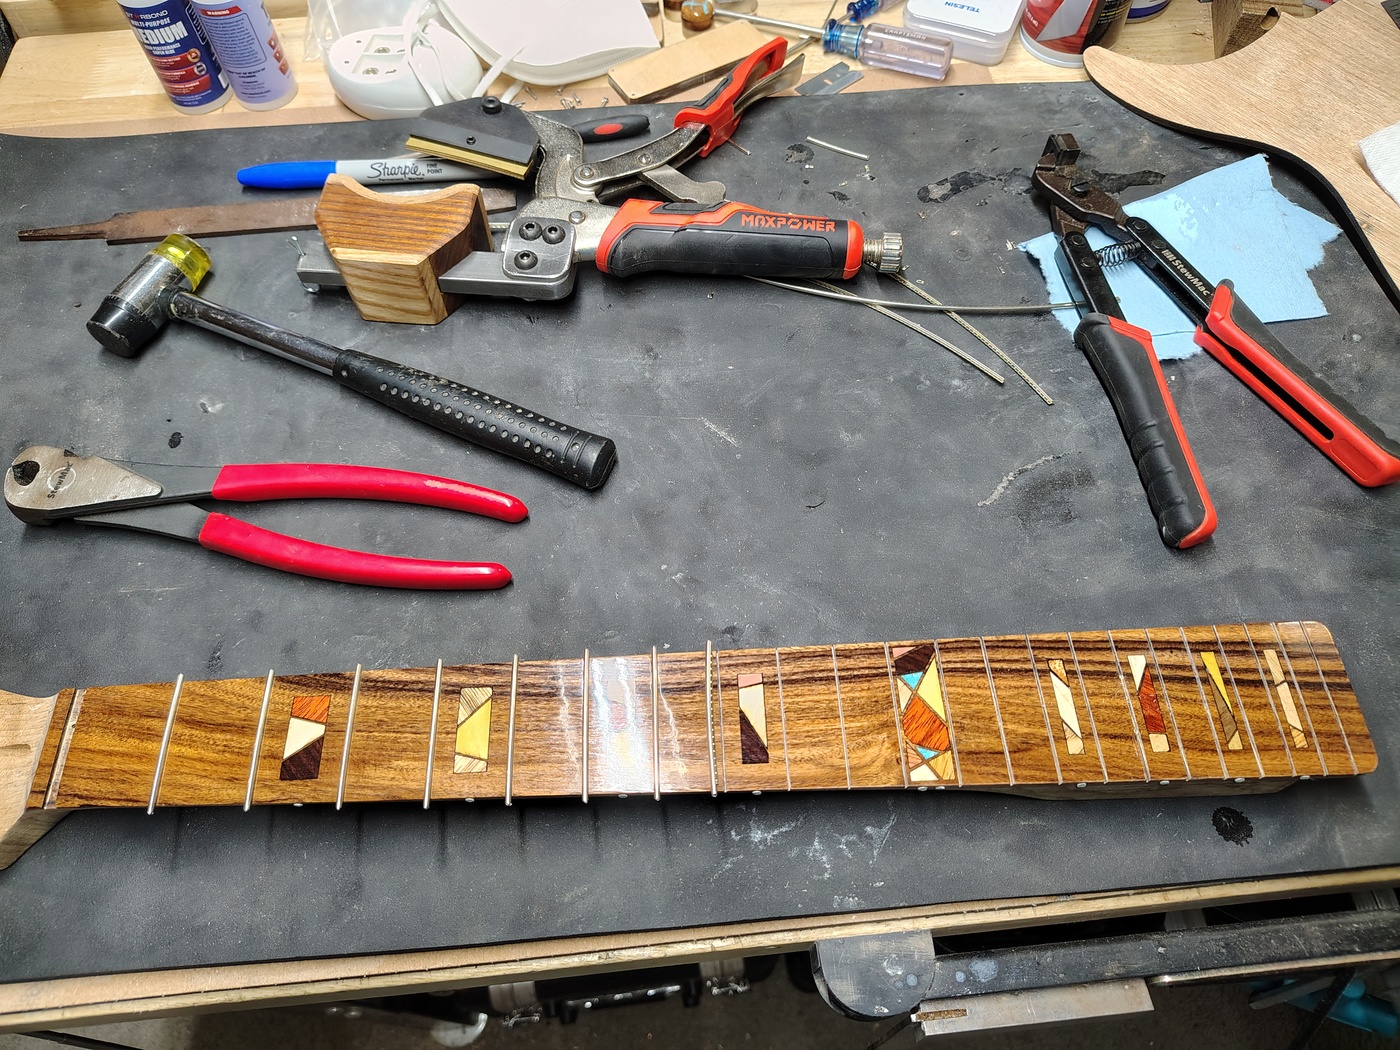
Getting the frets started in a fret slot can be a PITA. You have to watch out for them flipping right before you hit them with the hammer. I saw a neat little trick on YouTube University — take a very small triangle file and file a small V into the top of each fret slot. Then you can use a small rubber or dead blow hammer to begin to install the frets. They start a lot easier. I like to start on one end and get it seated, switch to the other end and get that seated, and then go back and forth over the length of the fret. When I'm done hammering in a fret I check and make sure that they are completely seated. If not, I whack them a few more times. After I have them completely seated I use the fret jaws to make sure they're down and have the right shape. That's them in the top of the next image. Don't buy from StewMac. They're very expensive. I got mine from Guitar Builder Online. They're a bit less expensive and they're actually better than the StewMac version. You don't actually need these but they make things a bit easier. I used to just use the hammer and check very carefully to make sure they seated properly.
×
![]()
I don't cut all the frets before I install them, I do them one at a time. I'm not a big fan of bound fretboards but there is one thing I like about them, I can't see the ends of the tangs underneath the frets. So, I use a StewMac fret tang nipper (expensive but worth it) to undercut the frets so that I can fill the ends of the fret slots with a sawdust/glue mix. That way you don’t have those annoying little shiny metal pieces staring you in the face every time you play. You can see the fret tang nipper on the right in the above picture.
Once you're pretty sure the frets are where they're supposed to be get out your trusty fret rocker. You do have your trusty fret rocker, don’t you? If not, check Amazon for the fret rocker bundled with the little fret hammer for about $7. Check for high frets. You will definitely have a few. Whack them down with the fret hammer and move on to the next step. You'll never get them perfect so just try to get them fairly good.
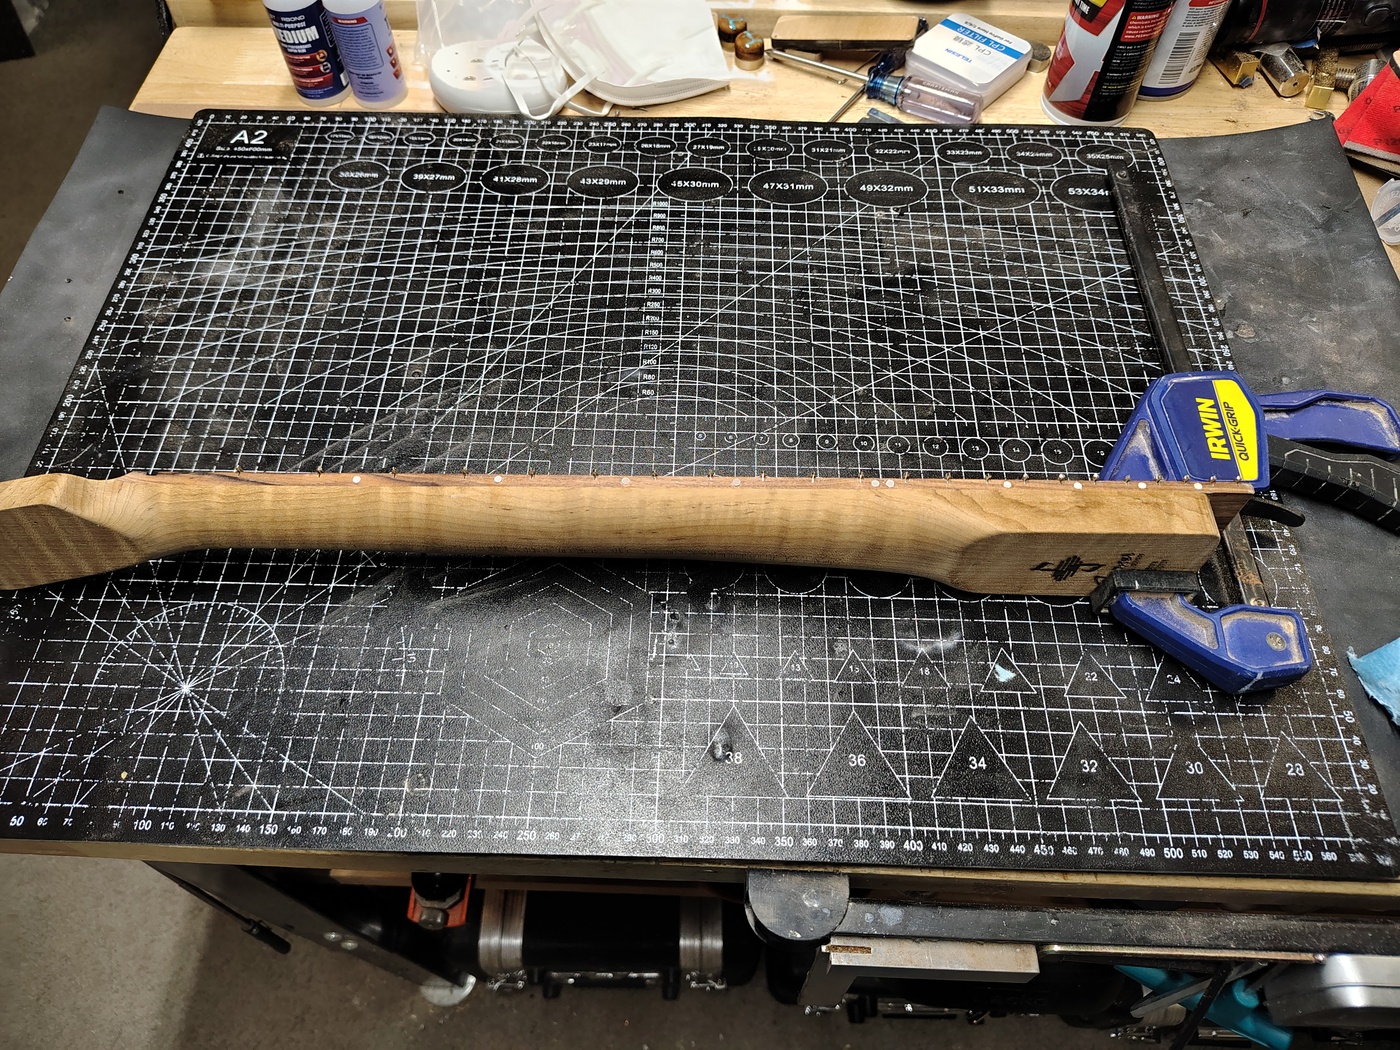
Now that the frets are as good as you can get them you need to glue them in. I know some people just blow that off (I used to) but, after seeing some sprung ends, I decided that it doesn't hurt and it probably helps. It may actually effect the tone since it bonds the fret to the wood. If you're going to finish the neck with CA glue set the neck on it's side and, using a micro tip, drip CA glue into the fret end until it drips out the other side. Try to to get glue everywhere. I use a clamp to hold the neck in place and a plastic mat so the CA can be cleaned up. As soon as you see the glue drip through use the edge of a paper towel to wick out the excess glue on both sides.
×
![]()
If you're not going to use CA to finish the neck with CA glue you can use Titebond to try to at least get the ends glued down.
If, like me, you've clipped the tangs off at the ends of the frets you can fill the void with Titebond mixed with wood dust. Whenever you mix wood with glue the resultant mixture will dry much darker than the dust that you use. In this case I used roasted maple dust to fill in the holes in Bolivian rosewood. When it dried it was pretty close in color. Even if you didn't clip the tangs at the end there will still be a little void under then end of the fret tang so you might as well go ahead and fill that with glue and wood dust.
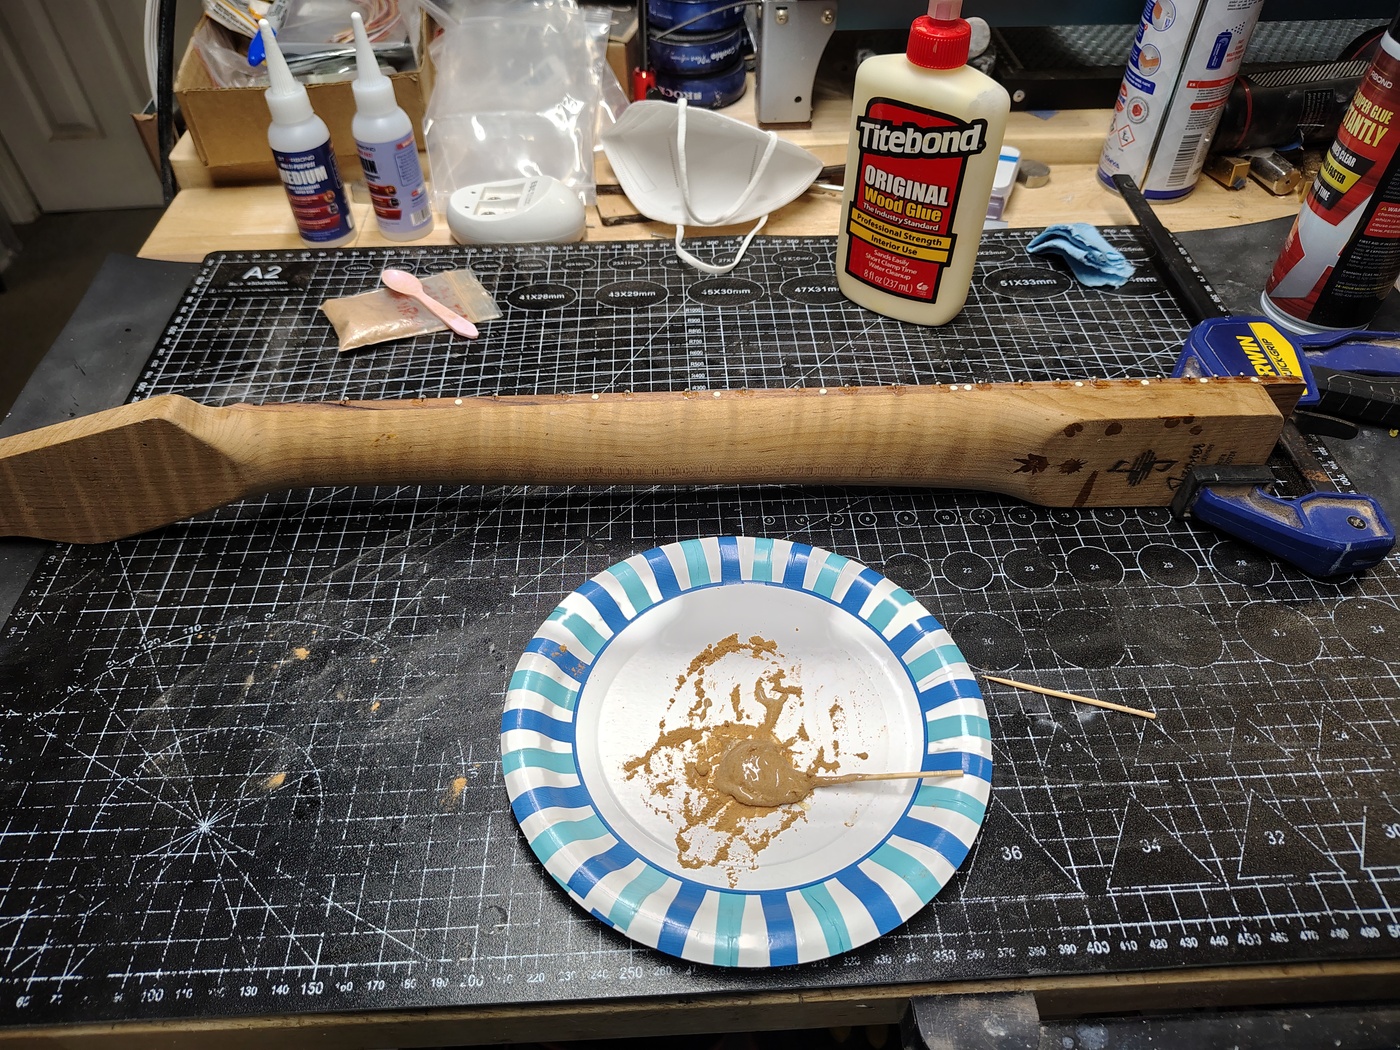
×
![]()
A couple of tips here - I’ve got a fret arbor press (from Solo Guitars) but I don’t use it anymore. It’s overkill. The jaws are much easier (and faster) than the press. Second, if you can make your own necks, take my advice and don’t use stainless steel frets. Use Nickel Silver or Gold (no longer Evo but StewMac makes something similar). The amount of wasted time and ruined tools from stainless steel isn’t worth it (especially since you’ll be able to re-level, crown and dress your own frets or replace them or replace the whole neck if you want to).
File the fret ends
Once you've got the wood dust and glue in the fret ends, and the glue has set, you need to file the fret ends down to the neck edge. There is a specific file made for this (you can see the one I use in the top of the next picture) but I prefer to do this with my fret leveling beam and some 120 grit peel-and-stick sandpaper. It's actually a bit faster.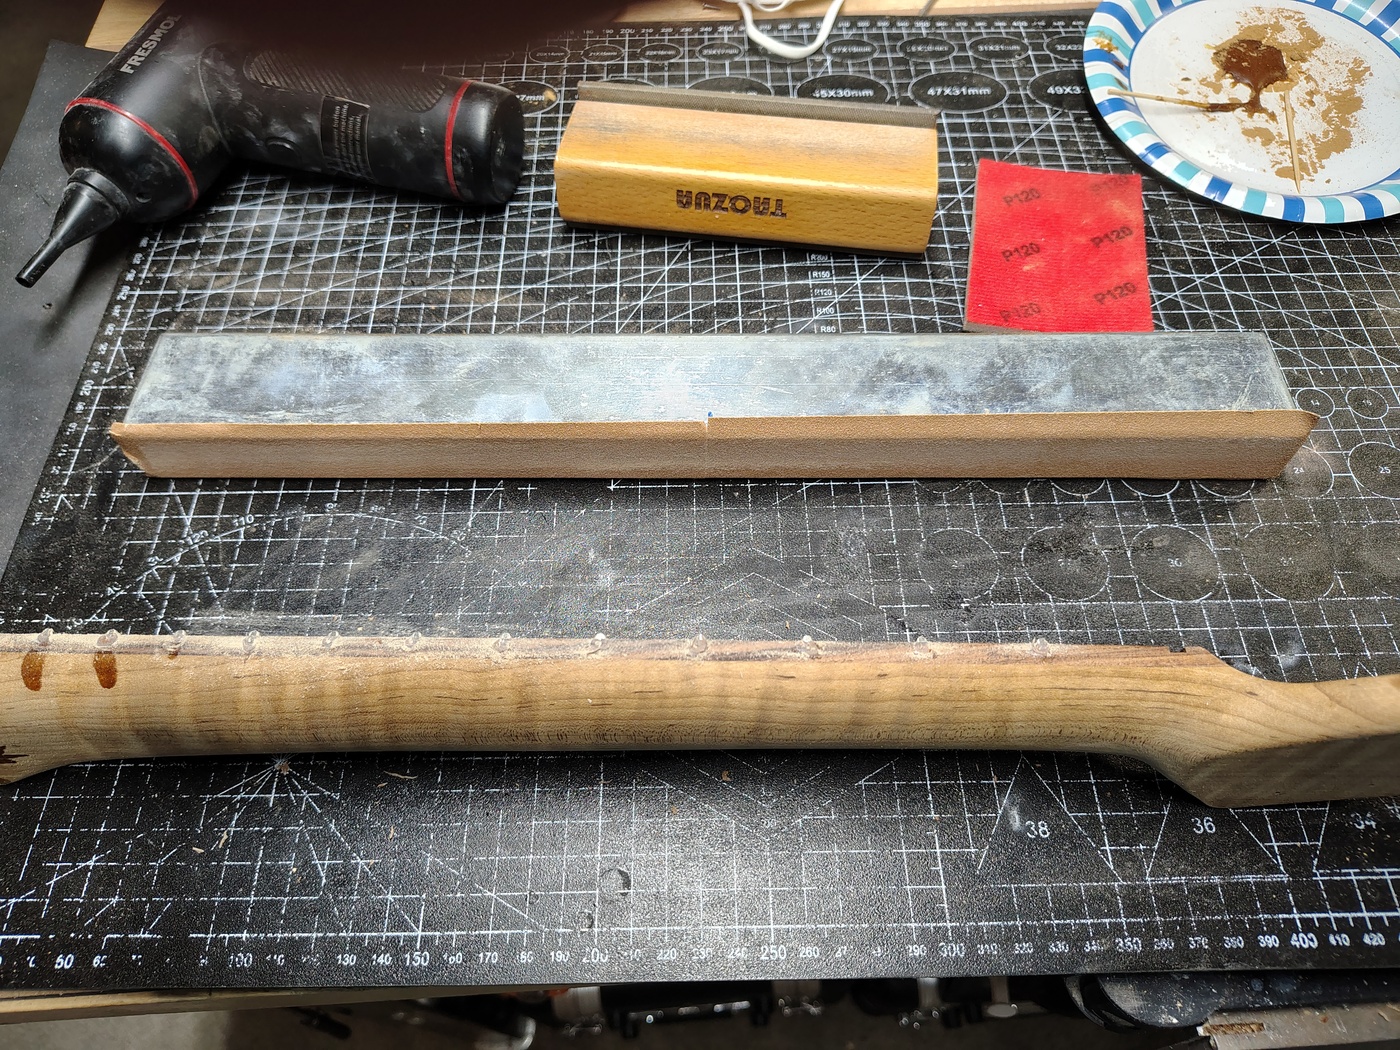
×
![]()
In addition to filing the fret ends flat to match the neck you need to angle them in. Most people use a 35 degree angle. I use the angled file of the fret end filing block to do this.
Leveling the frets
This is where the rubber meets the road. You have to get the frets level from one end to the other. I cover the fretboard between the frets with masking tape. Do yourself a favor and get one of those 3 width tape dispensers from Amazon. Once the fretboard is covered I put blue Sharpie on the top of the frets. Why blue? Don't ask me, I've never figured it out but it seems to be "the thing".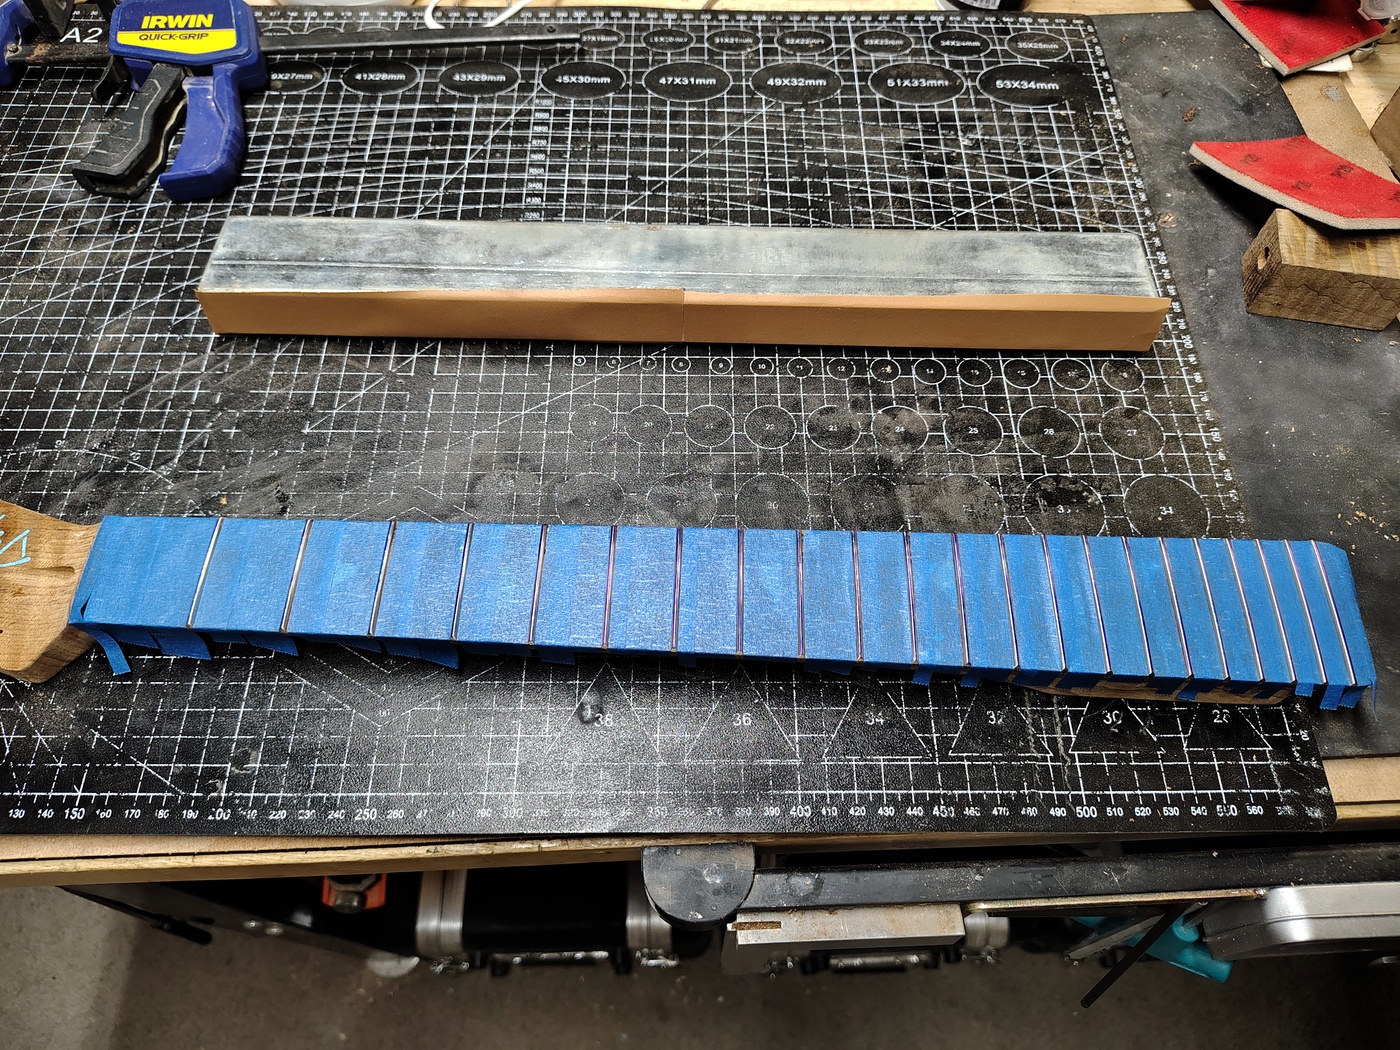
×
![]()
I use 400 grit peel-and-stick sandpaper on my leveling bar. If I've done a good job of installing the frets I shouldn't need too much sanding to get it flat. Using the leveling bar sand very gently from one end of the neck to the other. I tend to go from the heel toward the peghead. You can go in both directions if you want but it can cause you to get a bit sloppy. You want to move the bar parallel to the sides when you're near them but go straight north-south in the middle. This actually causes you to get a bit of a compound radius (which is usually a good thing). Keep checking the neck to see when you've taken the blue Sharpie off of the top of all of the frets. It doesn't have to be much. In fact, you hope it's not much because, if it is, that would mean you didn't do such a great job of installing the frets.
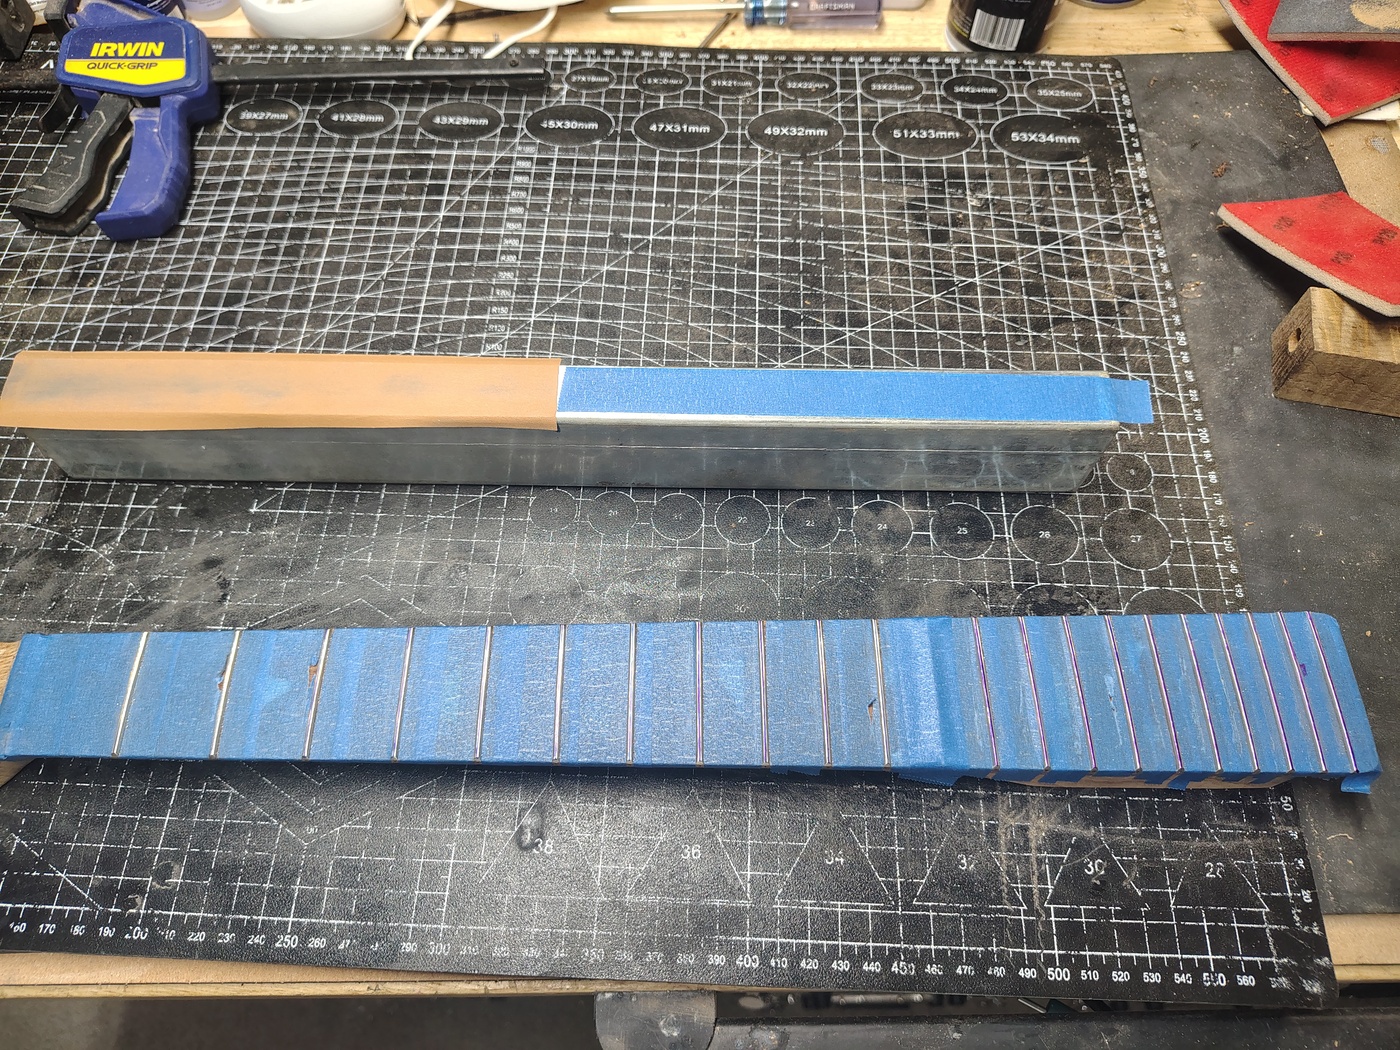
Once the frets are ready there is an optional step that can help with getting low action. I used to think this was snake oil but I've gotten to the point that I do it for every neck I make. It's called "fall away". What you want to do is cut a bit more off of the frets from somewhere around fret 15 to the last fret. The way you do it is to put two or three pieces of masking tape on the 12th fret, take half of the sandpaper off of your leveling bar and replace it with two layers of masking tape (to match the sandpaper thickness), re-Sharpie the frets from the 12th to the last fret, then very carefully sand that portion of the frets with the taped part of the leveling bar riding on the 12th fret. You don't have to get every fret from 12 down. I'm usually happy if I get from 16 to the end.
×
![]()
Crowning the frets
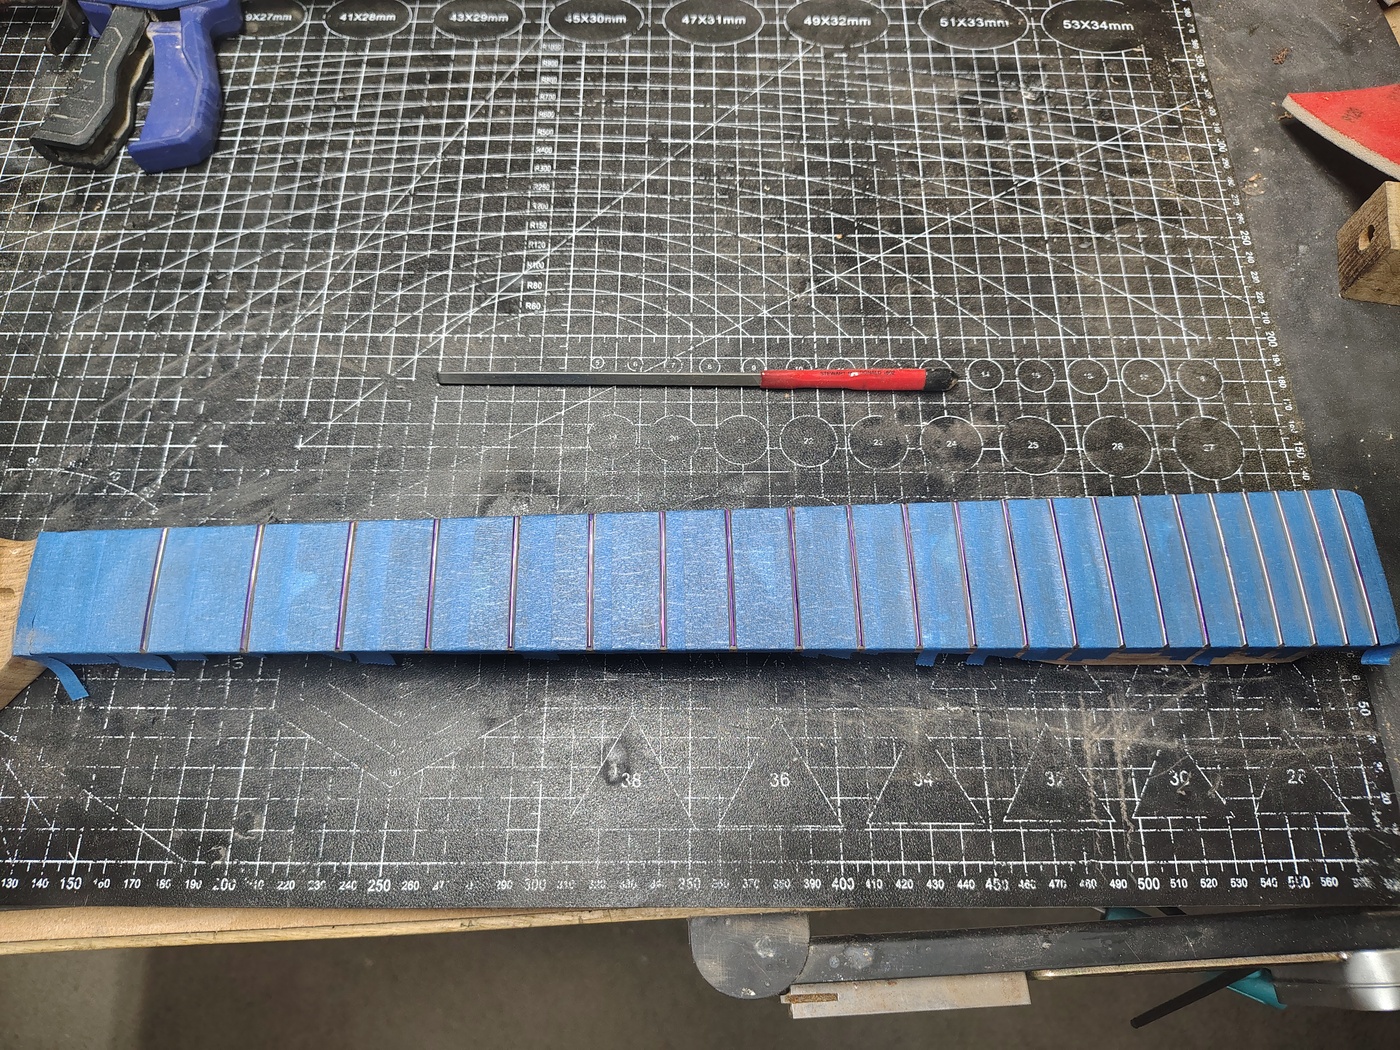
There are a million "fret crowning files" on the market. The only one that I would recommend is the StewMac Z-File. There are a couple of reasons why you should stay away from that though. First, they cost about $100. Second, and more importantly, you can do a better and faster job with a three sided file that has had the edges ground off. I bought the StewMac medium file for about $37. It's great. Now that I have it I'll never use anything else. However, there is an alternative on Amazon for slightly less money. Look for LAMSAM on Amazon. I haven't tried it but, if it had been available when I bought my StewMac file I probably would have bought it. I mean, it's a triangle file with ground down edges. How hard can that be to make?Now that we've got that out of the way, here's the next step. Put blue Sharpie on top of the frets. Hey, that sounds familiar. Deja vu all over again. The goal here is to use the triangle file to file away the blue from each side of the fret until there's just a very thin blue line across the top of the fret. You might think this is hard but it's actually very easy to do. I tend to just push the file and go very lightly. You'll be surprised at how easy and fast it is once you get the hang of it.
×
![]()
Dressing the frets
Remove the tape on the 12th fret and then to re-tape any place where the file has torn through. Use a fret end file to round the ends of the frets. If you don't have one they're relatively cheap on Amazon or you could use the triangle file if you're careful. Look on YouTube for a demonstration of rounding the fret ends. It's really simple once you see it.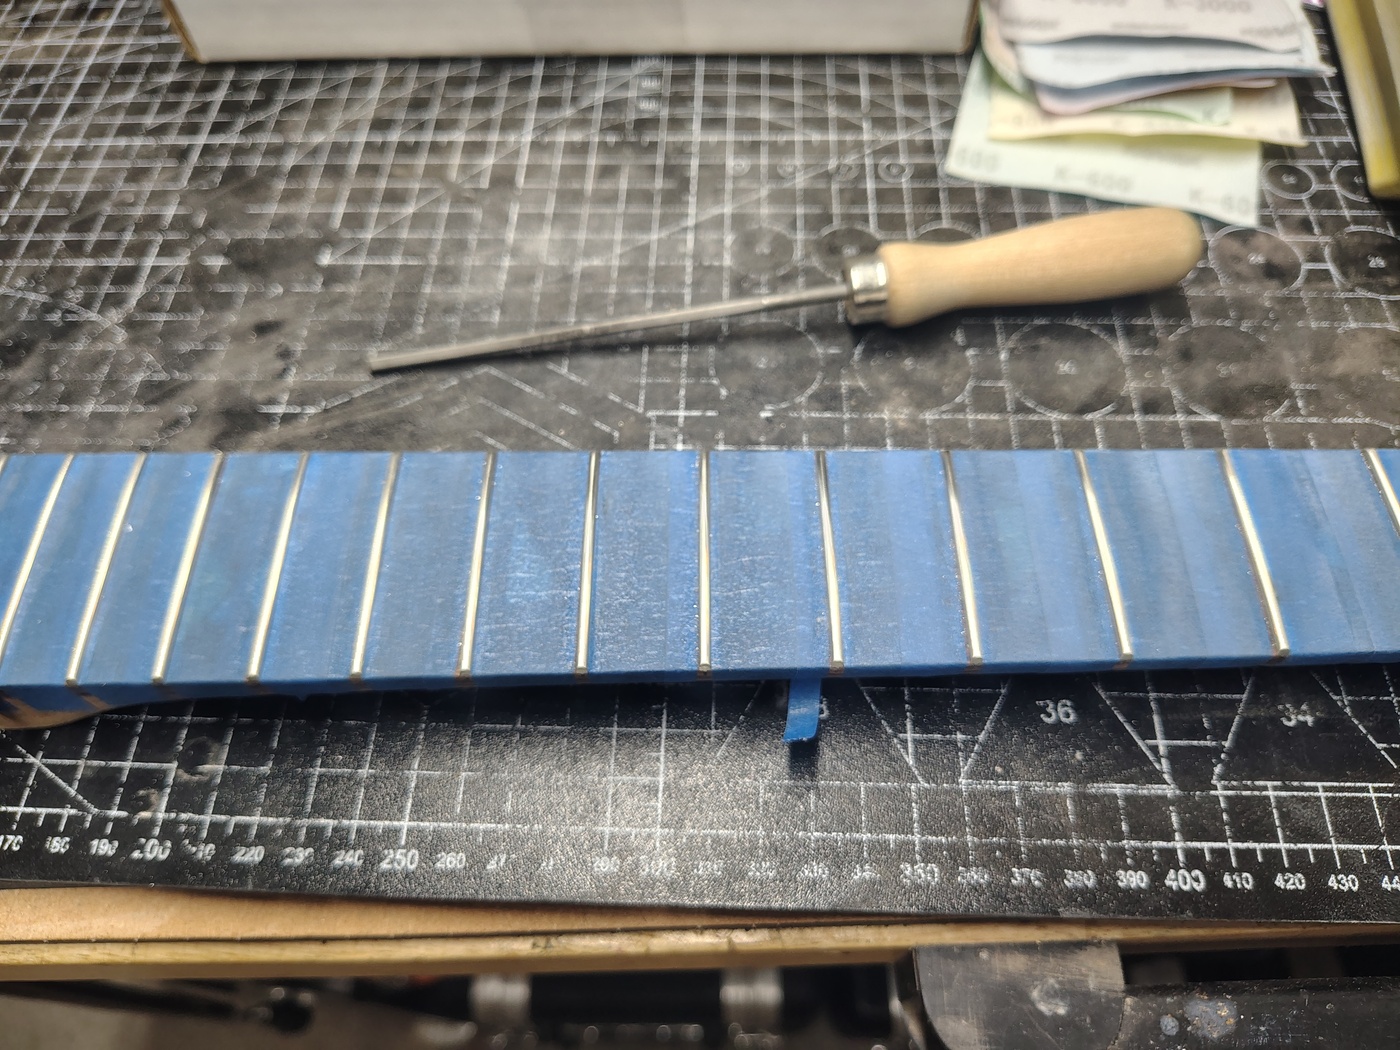
×
![]()
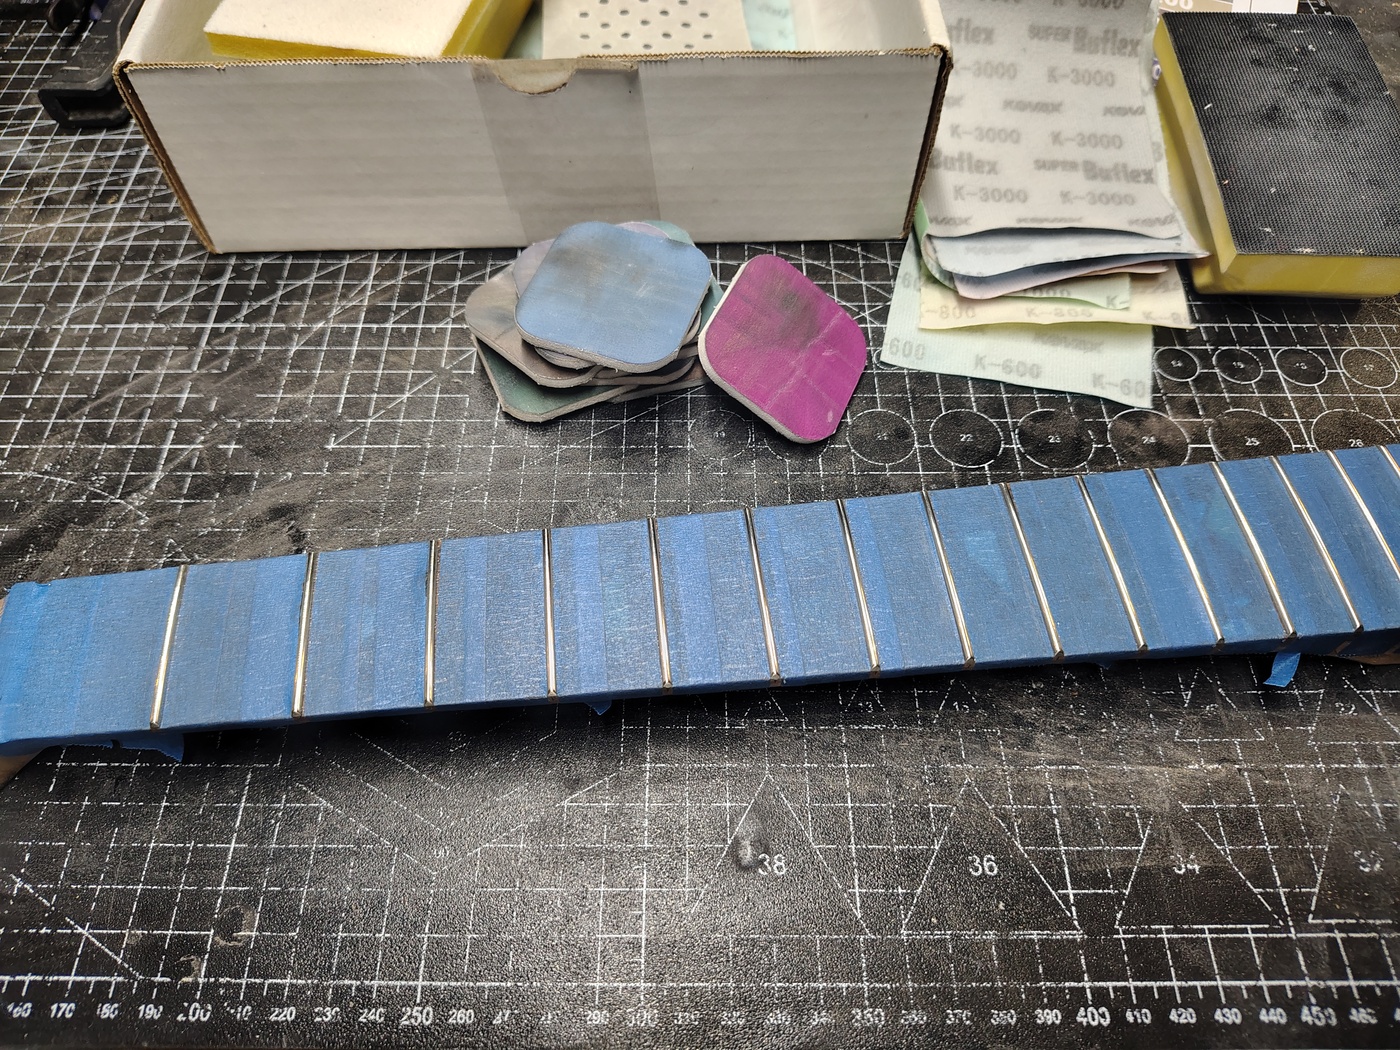
I use the Super Assilex and Super Buflex abrasive sheets to start on the frets. There is a soft pad that comes with the starter kits. I put the 600 sheet on it, fold it lightly in the middle, then run the folded part up and down the neck to finish rounding over the frets and clean off any blue left on the frets. After that I go through the same sheets that I use for finishing the CA finish but I run them back and forth on each side of each fret to smooth out the finish. I try not to do too much right on the top of the fret but it needs to be hit. The idea is to smooth it out but not cut it down. After the K3000 I switch to the Micro-Mesh pads and do the same with them. Again, the same ones that I used for finishing the CA glue. Don't poilish them with Meguiar's because it could interfere with finishing the rest of the neck. When you're done finishing it you can use Meguiar's if you want.
×
![]()
Finishing the neck
Finish sand everything! Excepth the fretboard. Get rid of all scratches down to about 320 grit. Mask off the fingerboard and stain the neck (if you want to, I use Transfast powder and/or StewMac Colortone stains). Hint: I use 1/4” plastic pin striping tape for cars. It’s a PITA to get on but, if you burnish it on, it helps prevent wicking of the stain. If you do stain the wood you need to go back over it lightly with 320 to get rid of any raised grain.After that you need to follow the same schedule that is used for the body. See Sanding and finishing.
Drilling the tuner holes
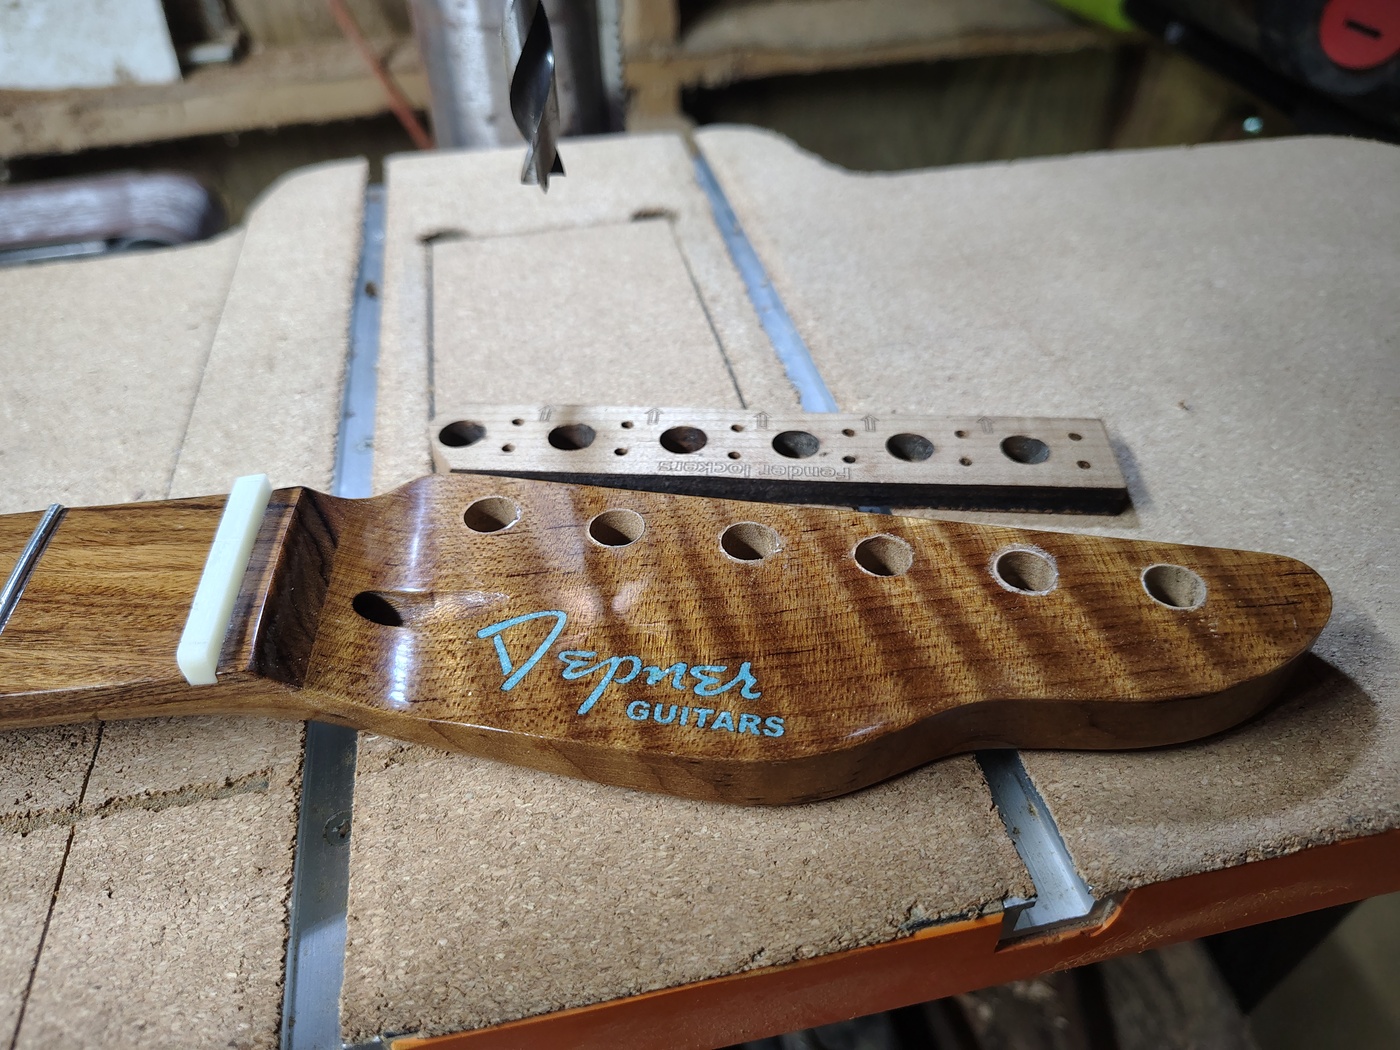
I made a template (using the laser) for Fender locking tuners and one for Gotoh Kluson style locking tuners. It turns out that the Fender tuner spacing and hole size sre the same as the spacing and hole size for the GraphTech Ratio locking tuners (expensive but I won't ever use anything else now). So, I used the Fender template to drill the holes. The two pins on the Fender tuners aren't the same size or location as the pins on the Ratio tuners so I didn't use that part of the template. Ratio tuners come with a bunch of aluminum adapter plates and I hate those two pin things anyway so I used some of the plates. When you drill the holes, do it slowly and have a backing piece so that the wood won't tera out on the back.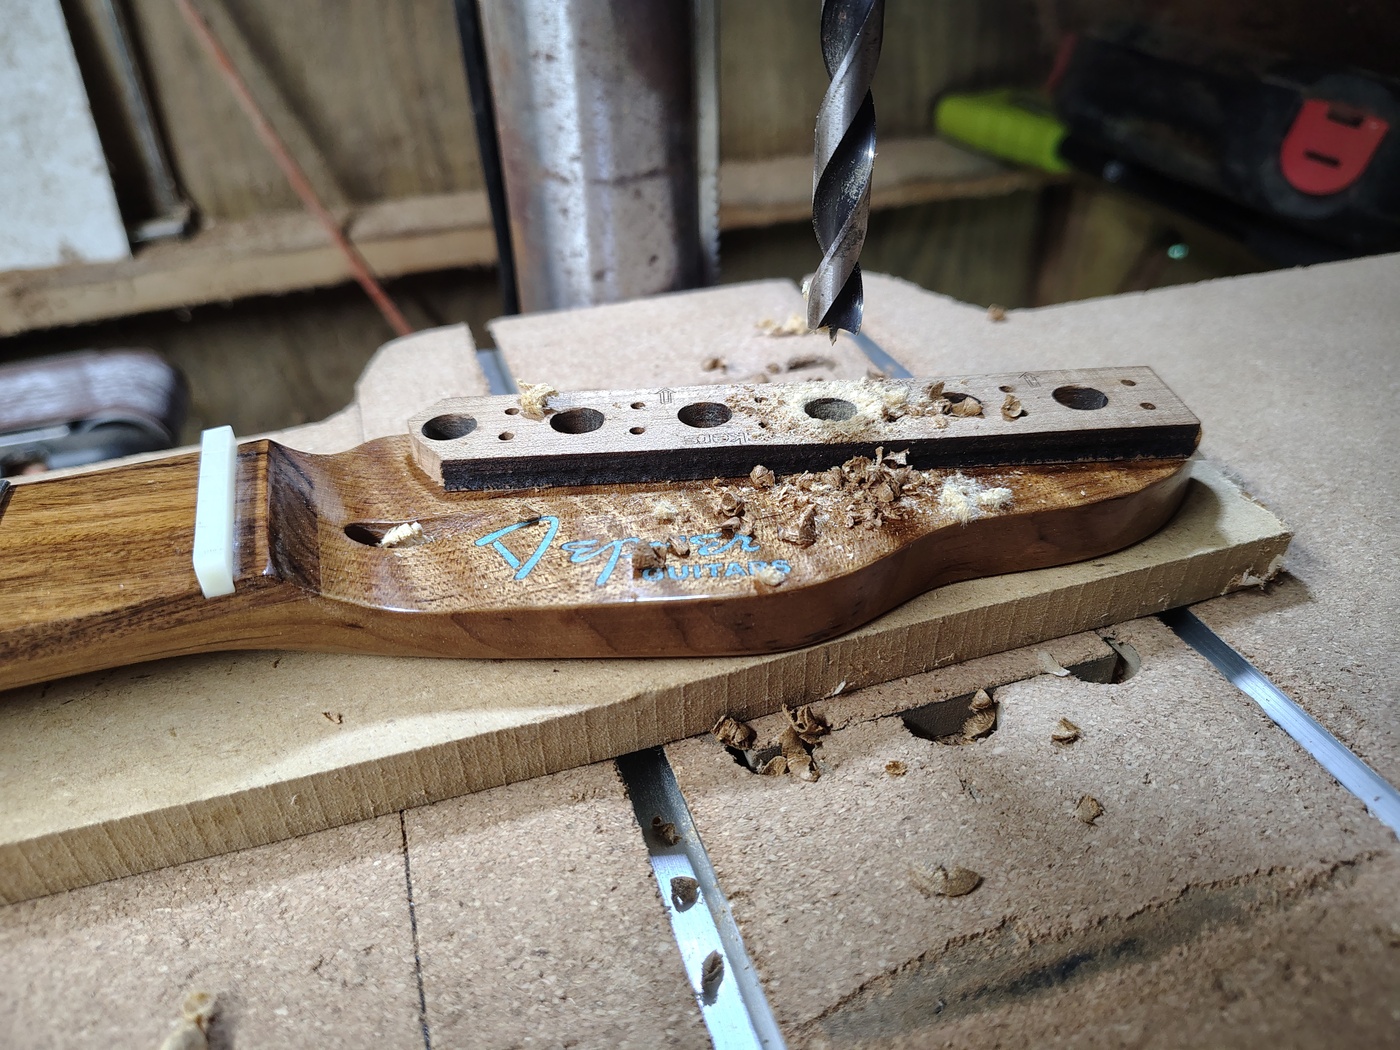
×
![]()
When you're done they should look like this:
×
![]()
Copyright © Jan Depner 2026 - All rights reserved